The Complete Process: Building and Finishing a Custom Frame with Distemper Paint
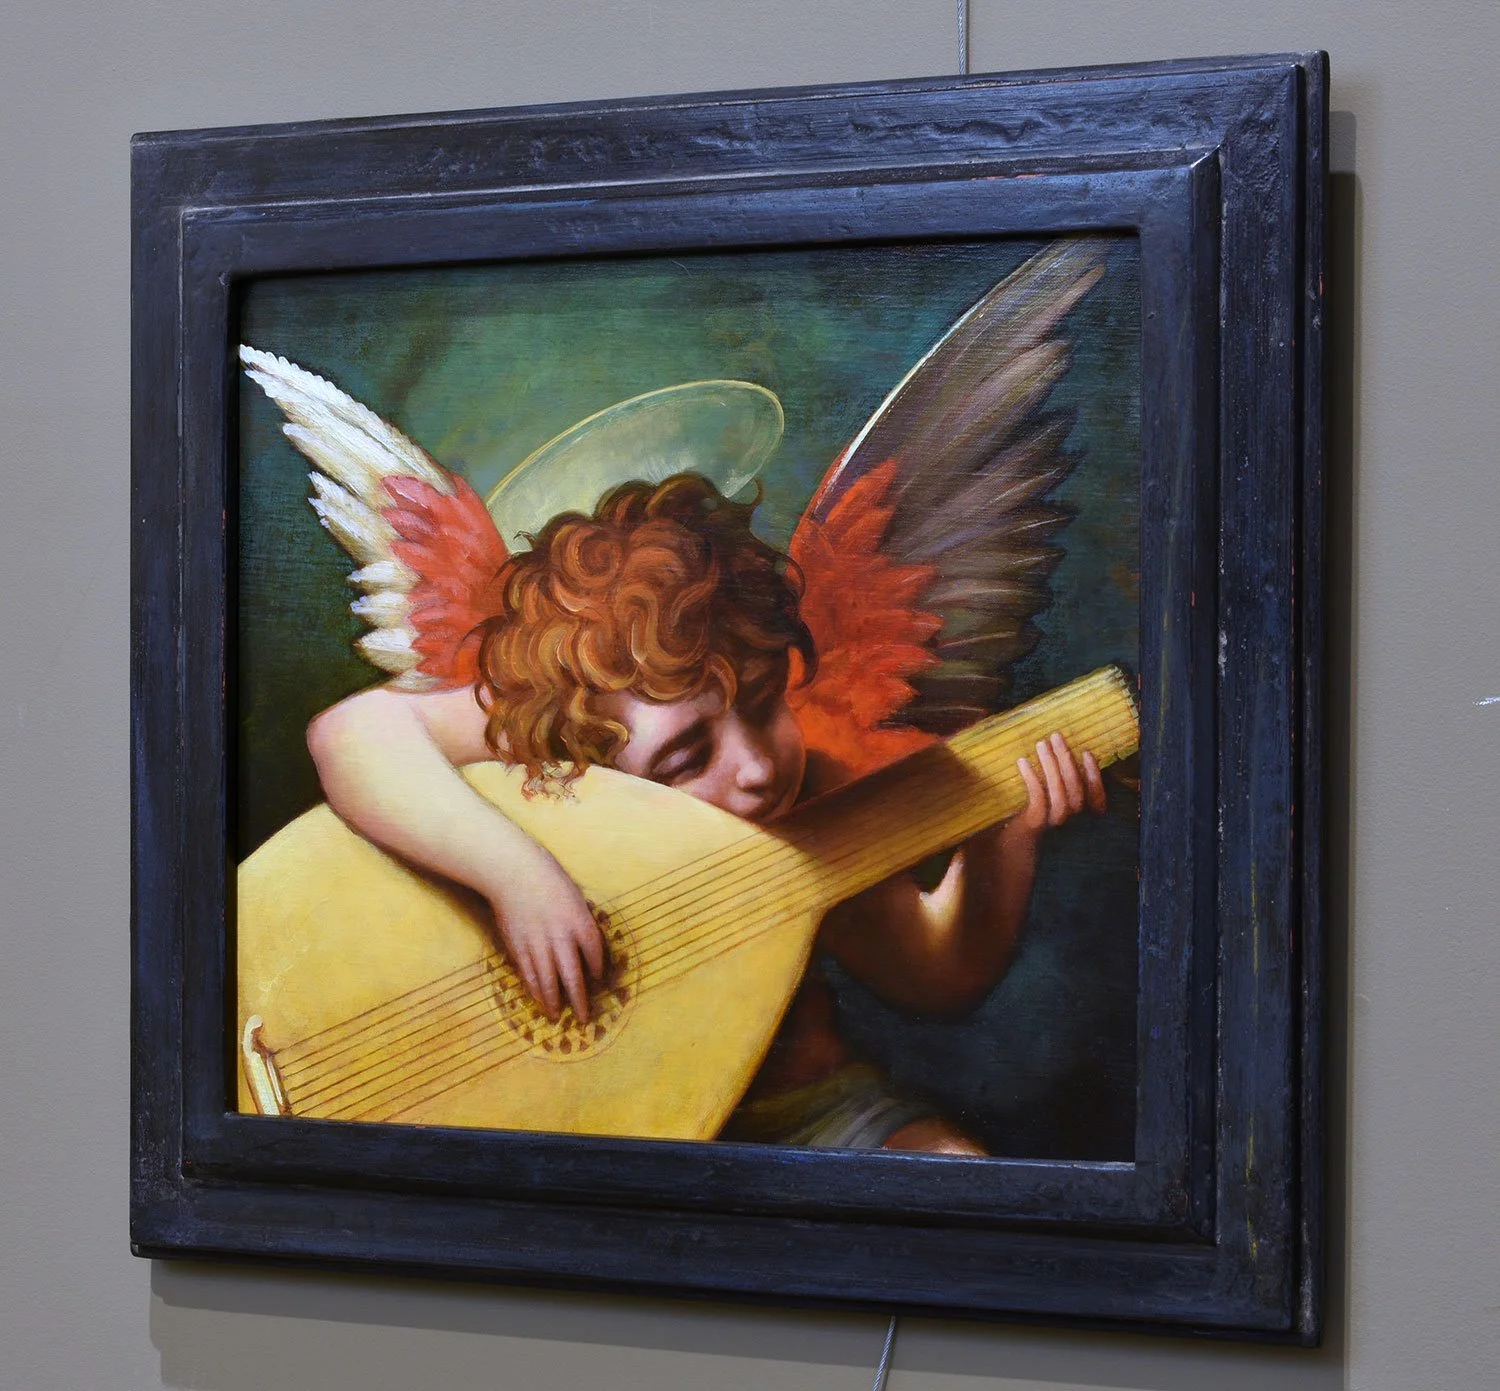
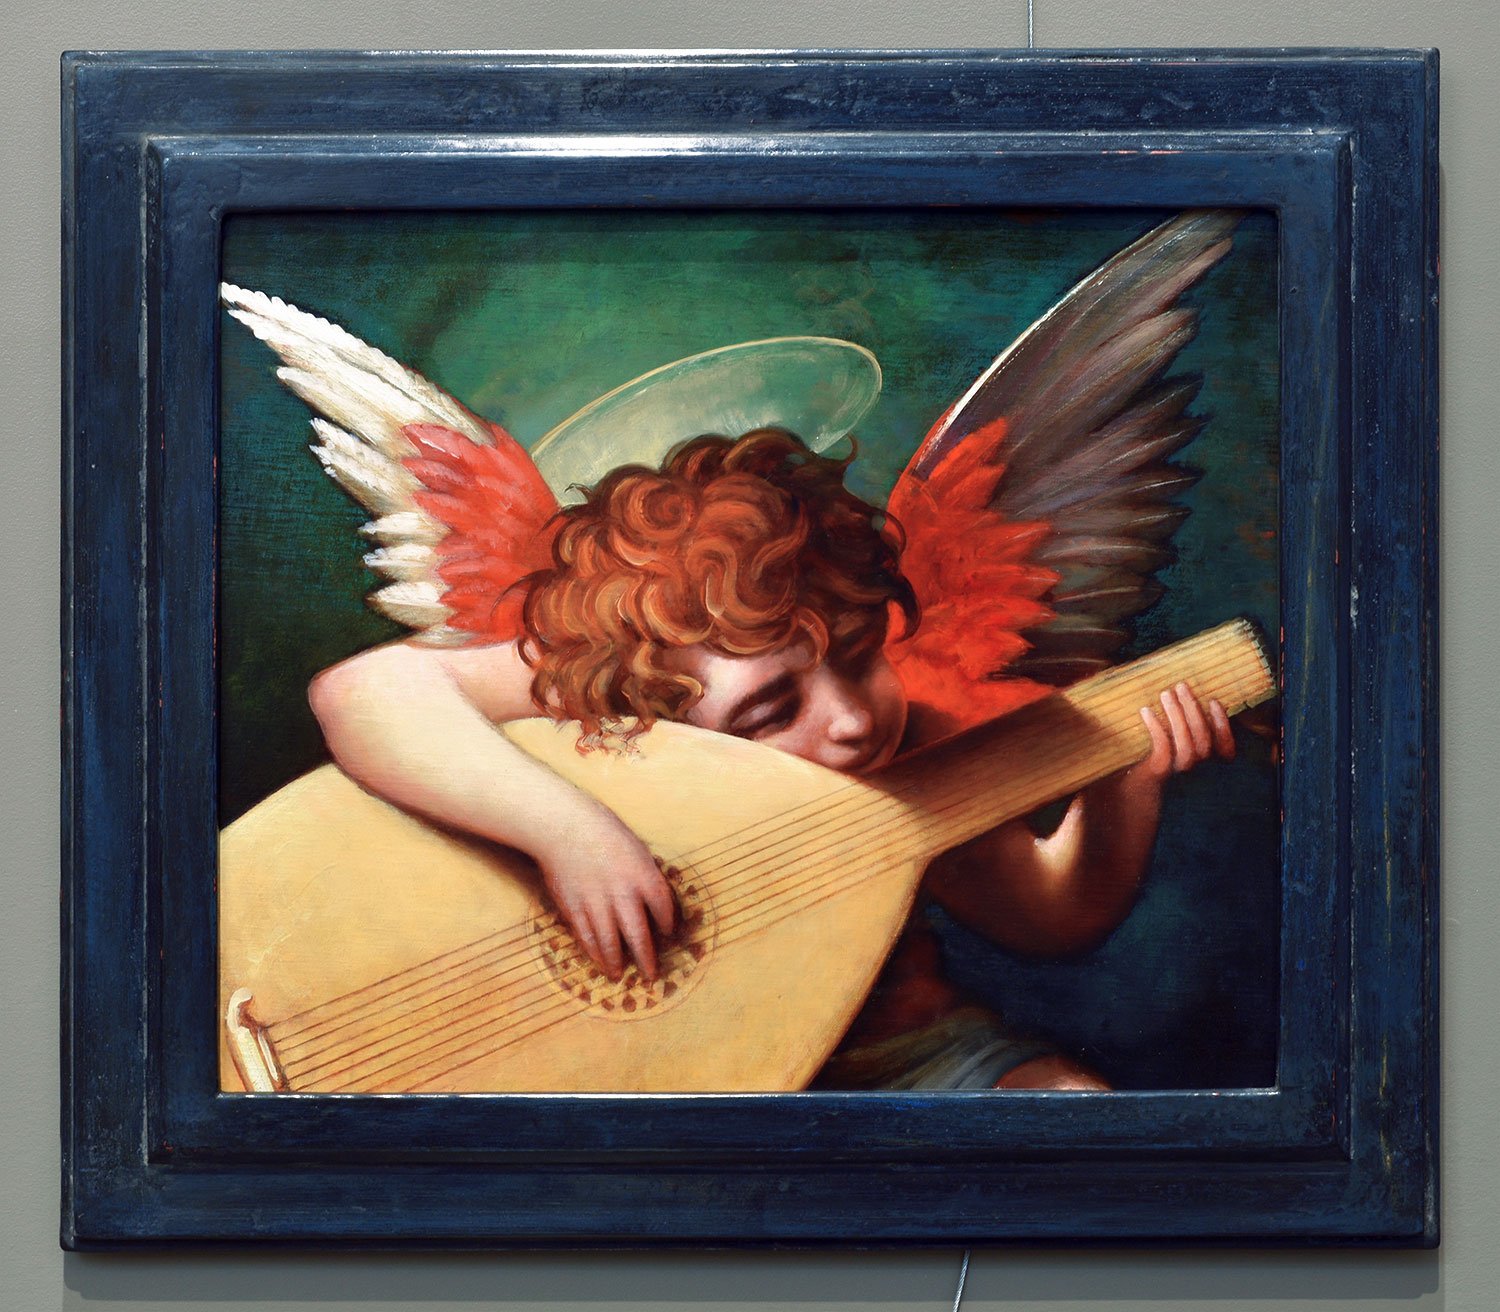
I recently completed a painting inspired by the 1521 masterpiece Cherub Playing a Lute (also known as Musical Cherub) by Rosso Fiorentino.
I often wonder if "master copy" is the right description for my work, because I frequently go off the rails and stop referencing the original entirely. I tend to use the master work as a starting line, and then I try to build upon or alter it based on my own vision. Regardless of the definition, I recently finished building the frame for this piece, and I thought I would share the process.
For me, there is something incredibly satisfying about creating a painting and then building the actual structure it will be displayed in. Frankly, I usually feel like I haven’t followed through on the artwork unless I build the frame myself. The frame is a vital component of the piece, no less important than a specific color, object, or symbol within the painting itself. They work together to come alive and have a cohesive voice on the wall. While I have bought ready-made frames in the past, building custom frames always feels more complete.
Here is a look into how I designed, built, and finished this particular frame.
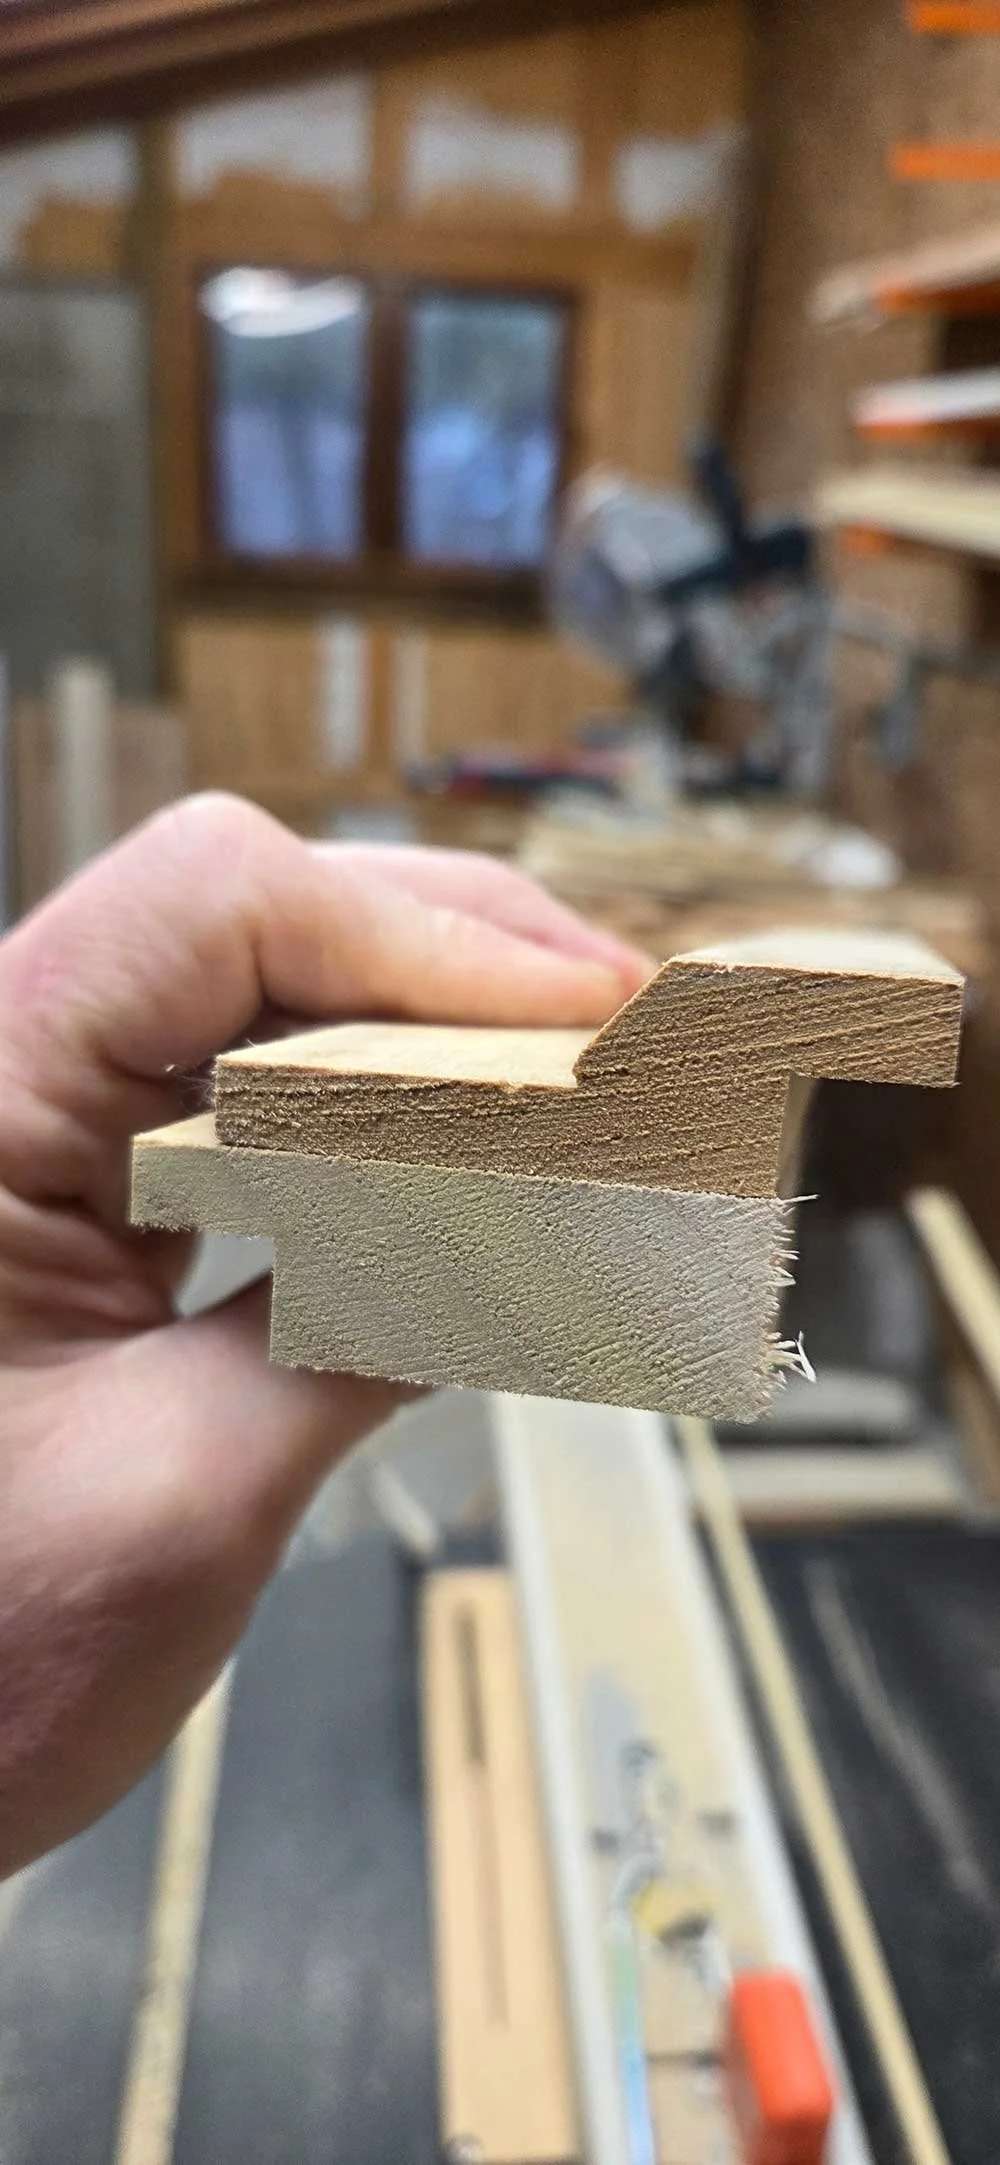
Step One: Designing the Profile
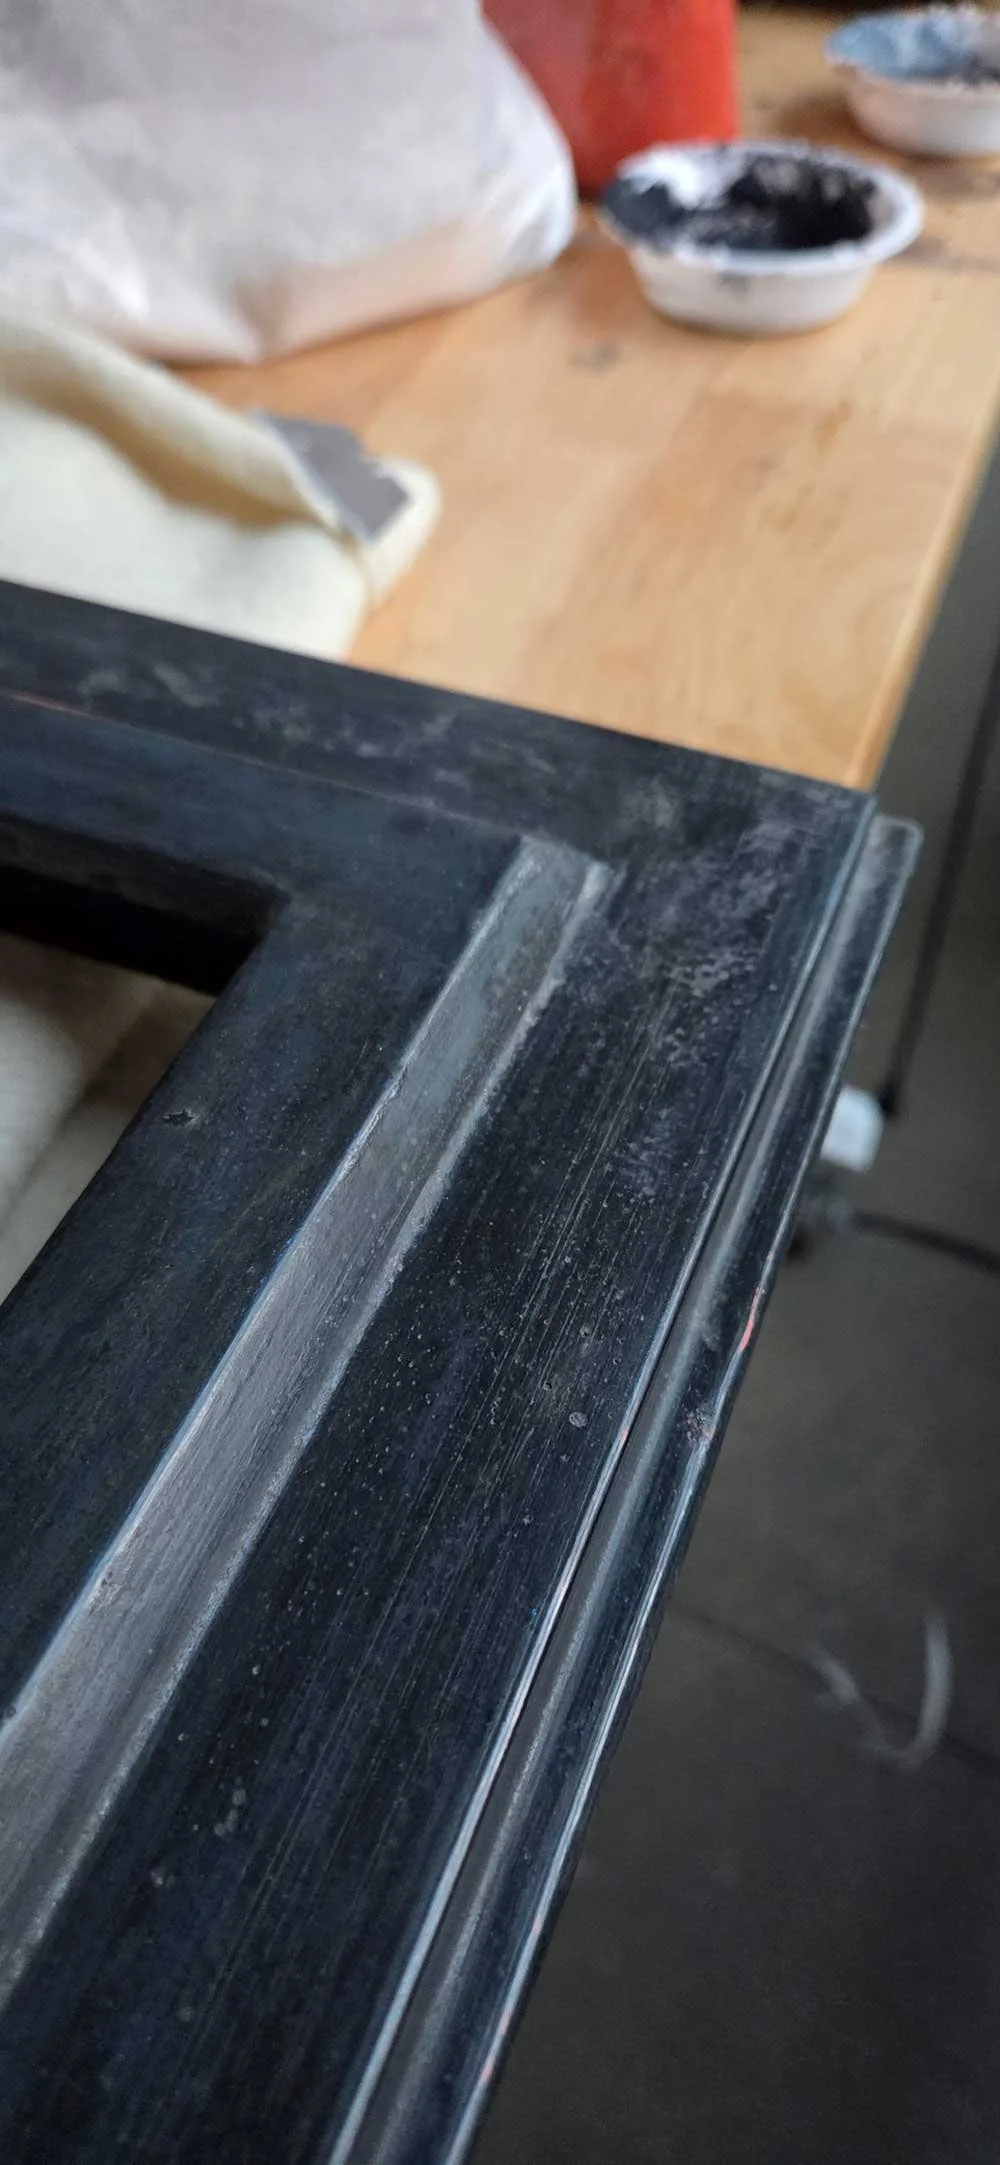
The first step is coming up with the design of the "profile"—the shape of the frame's edge.
I make my profiles by putting several pieces of shaped wood together, almost like a puzzle. This process feels very similar to the way I paint. I might start with a piece of wood, make a cut, or use a router on an edge, and then look at it to decide what it needs next. I will shape another piece, put them together, and imagine what the final look will be.
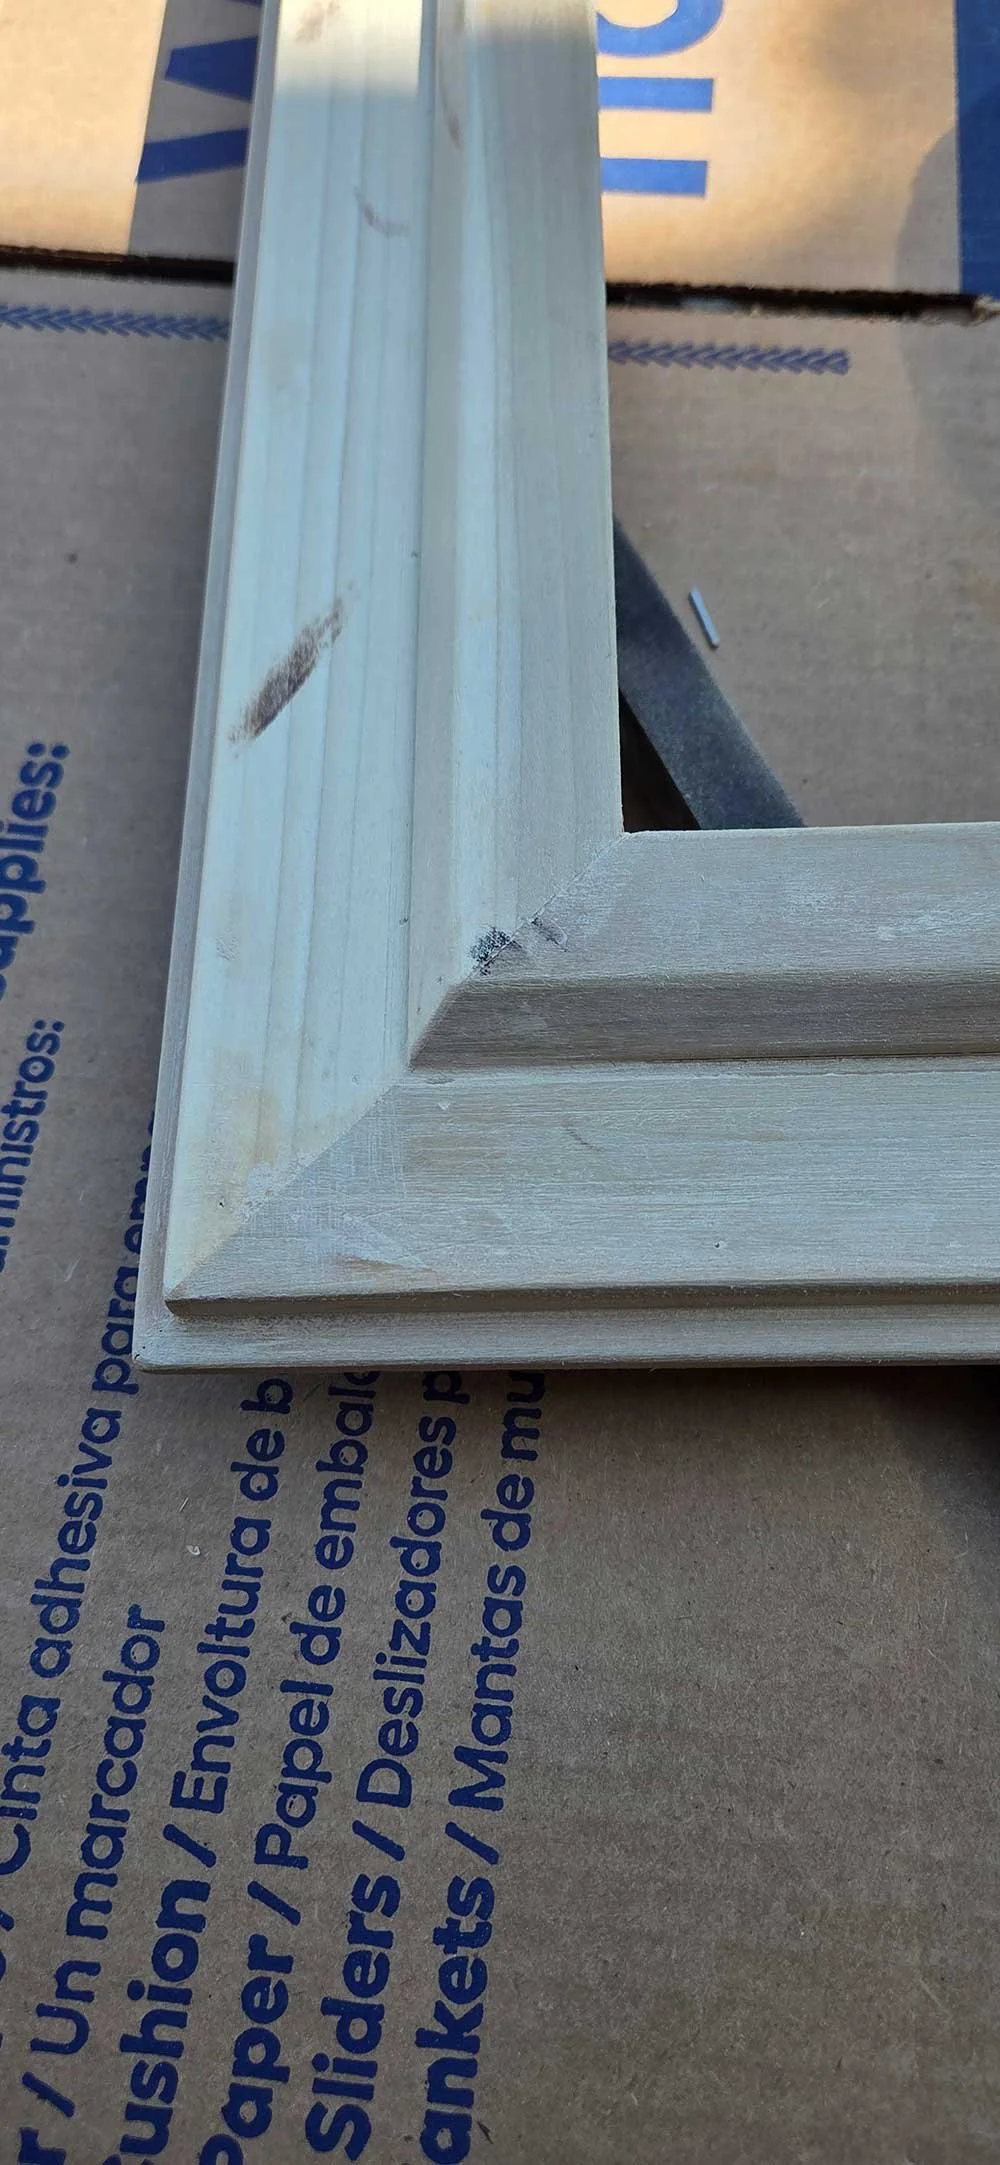
I am constantly making decisions about the depth of a groove or the radius of a curve. A lot of this comes down to the creative use of tools, such as knowing how to angle the blade on the table saw, or deciding which cut to make first. You would be surprised how much the order of operations matters. Once I have finalized the complex profile design, I usually glue the lengths together before I miter cut and join the final sides.
For this frame, I knew I was going to paint it, so the wood finish didn't need to be absolutely perfect. However, how meticulous I am at this woodworking stage is always determined by how I plan to finish the frame.
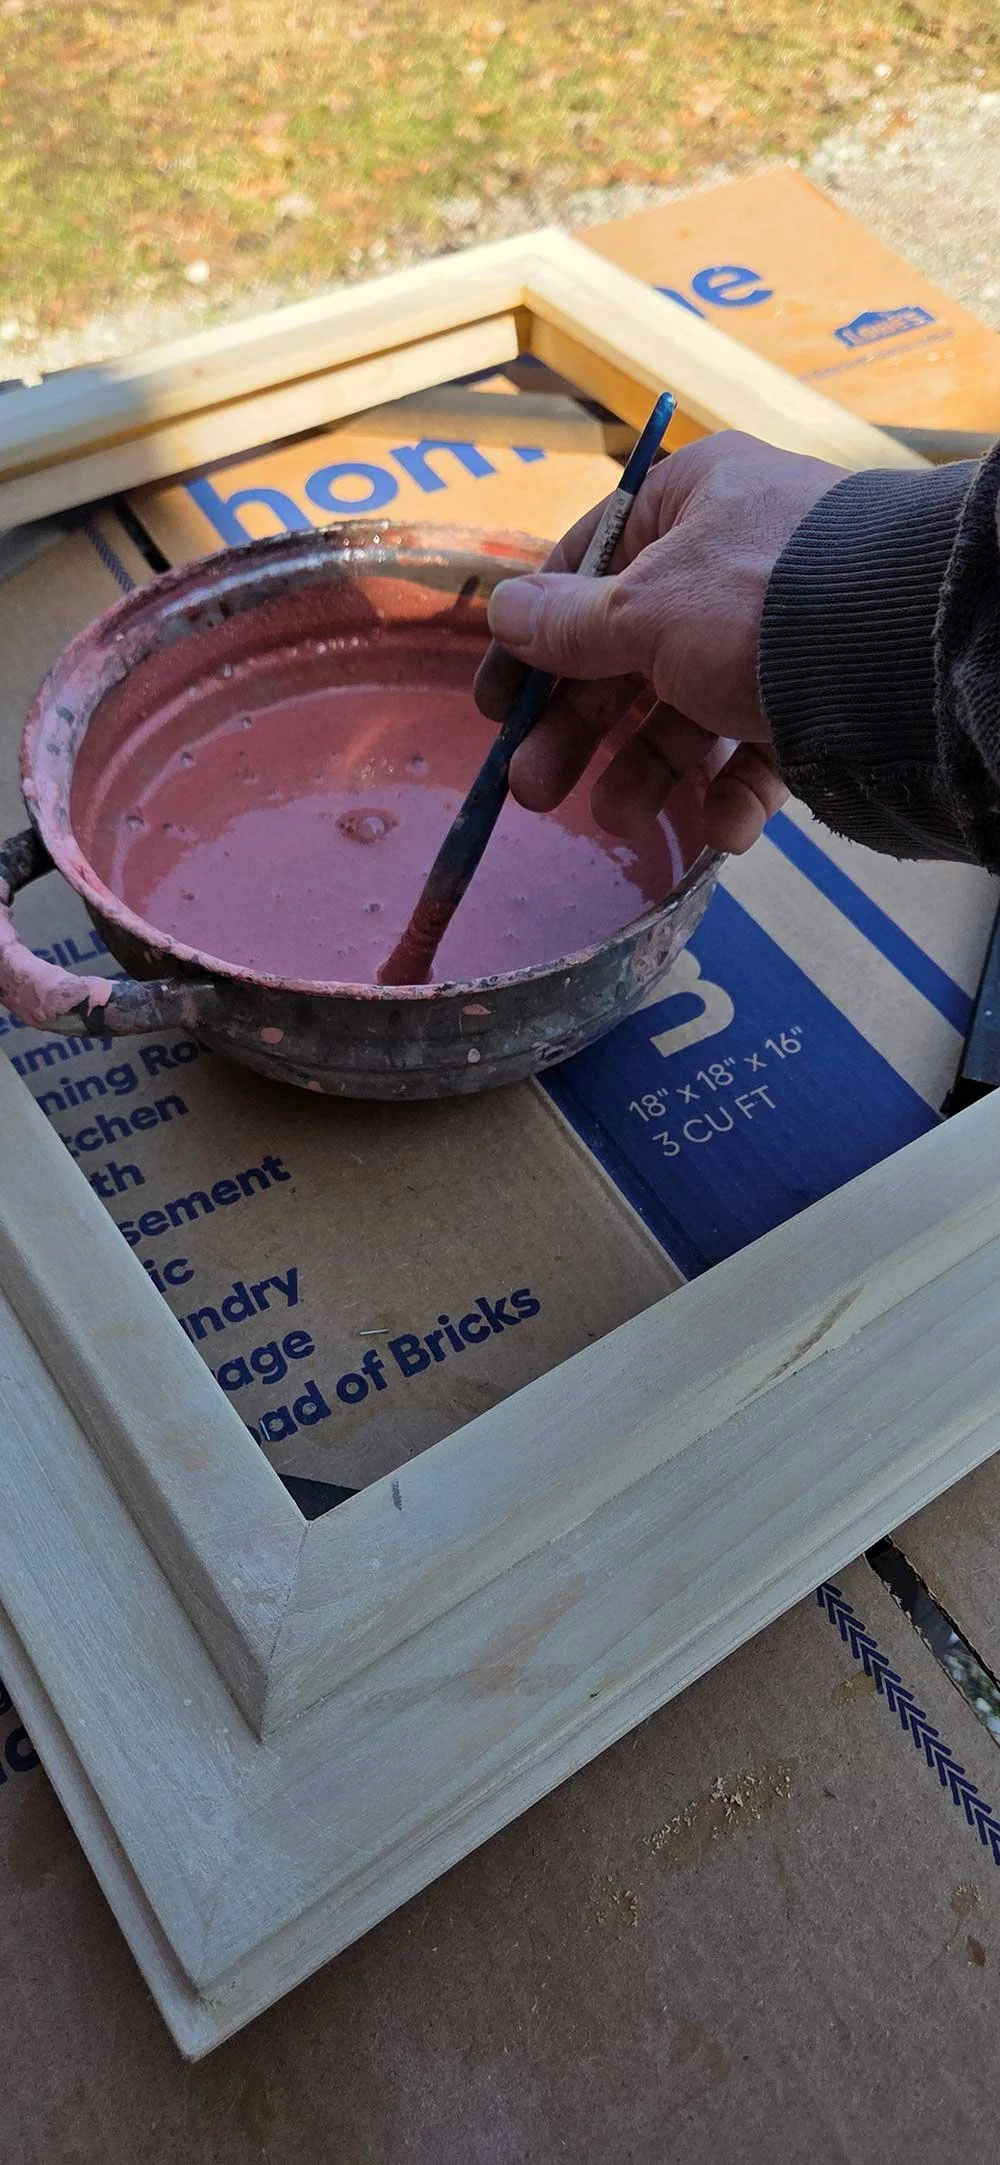
Step Two: Creating the Finish with Distemper
Once the frame is glued and assembled, the fun part starts. For most of my frames, I use distemper paint.
What is Distemper?
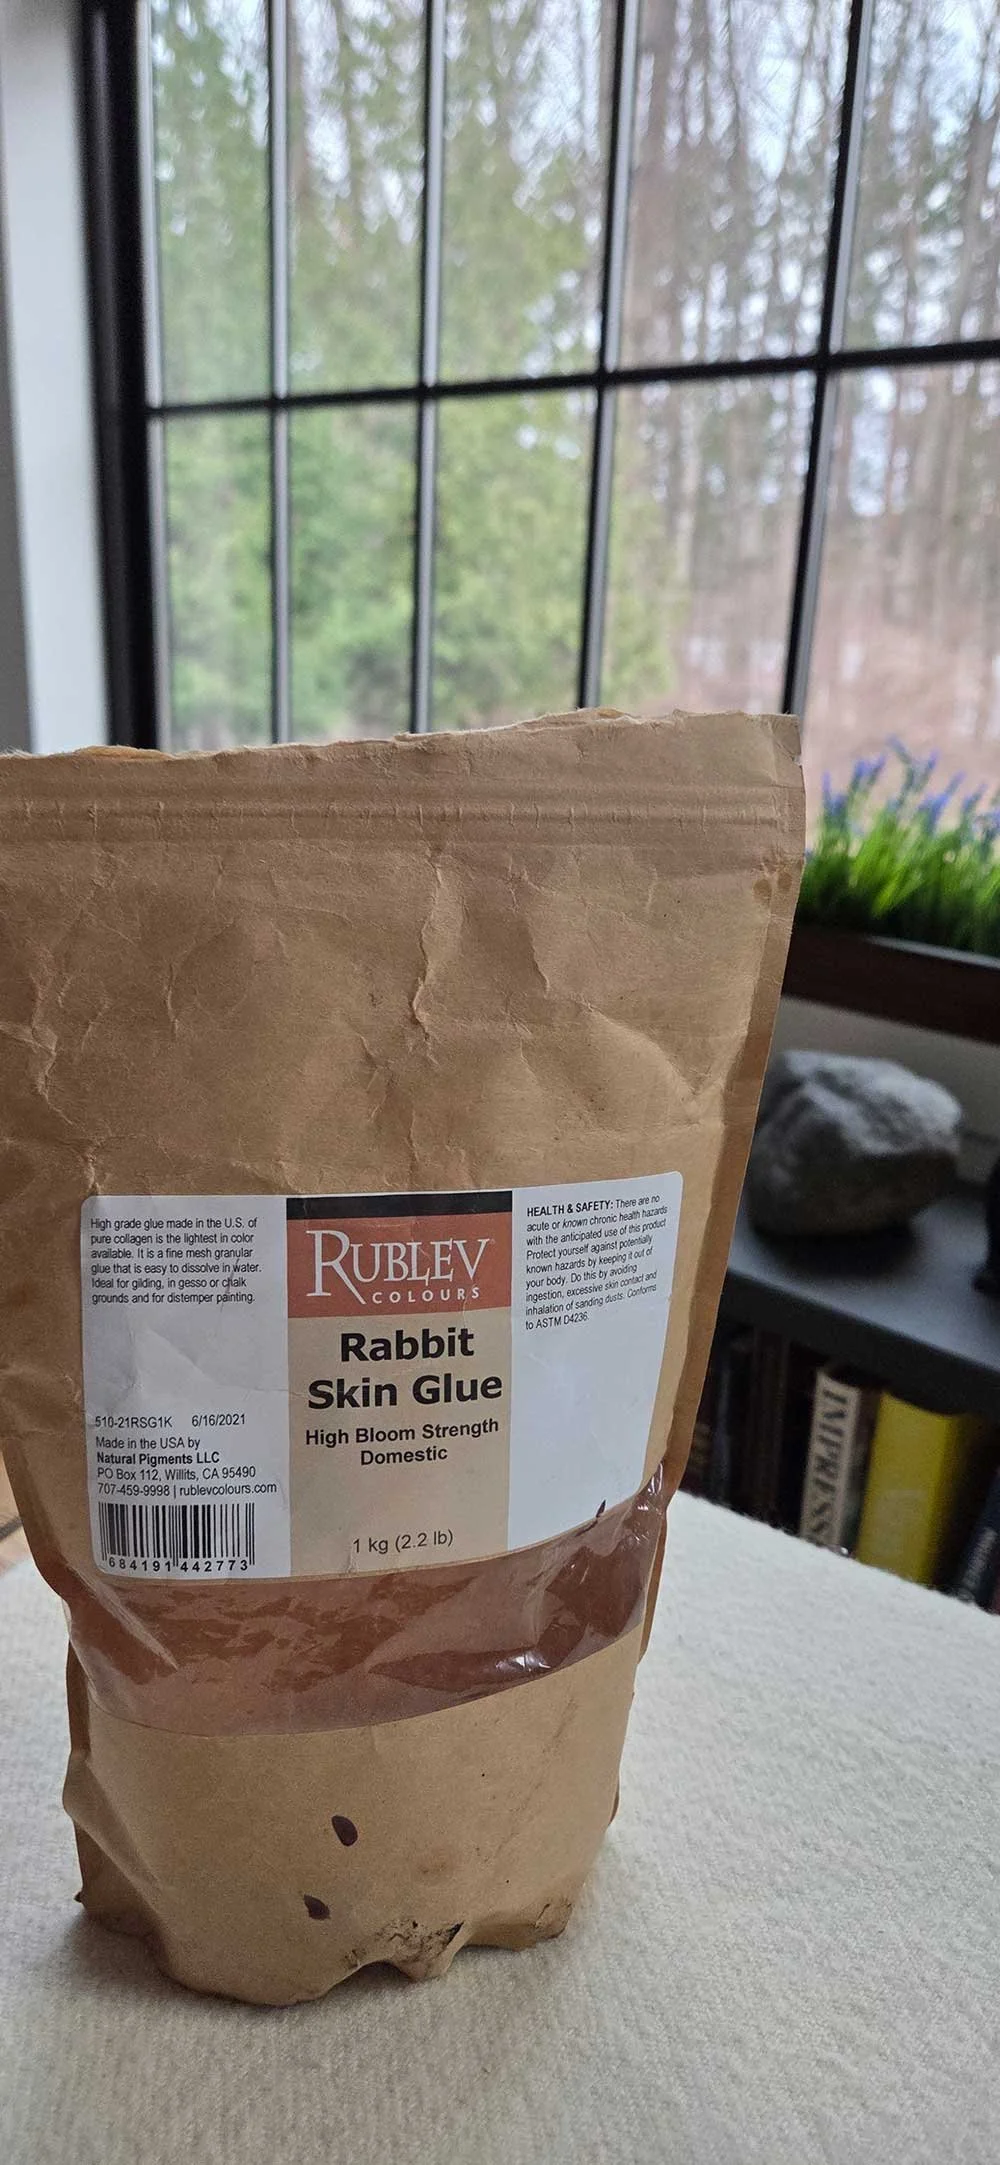
Distemper is basically a dry pigment mixed with a hide glue binder. I prefer using Rublev's rabbit skin glue. While I've found over the years that most hide glues are similar, I like Rublev because their materials always feel raw and authentic.
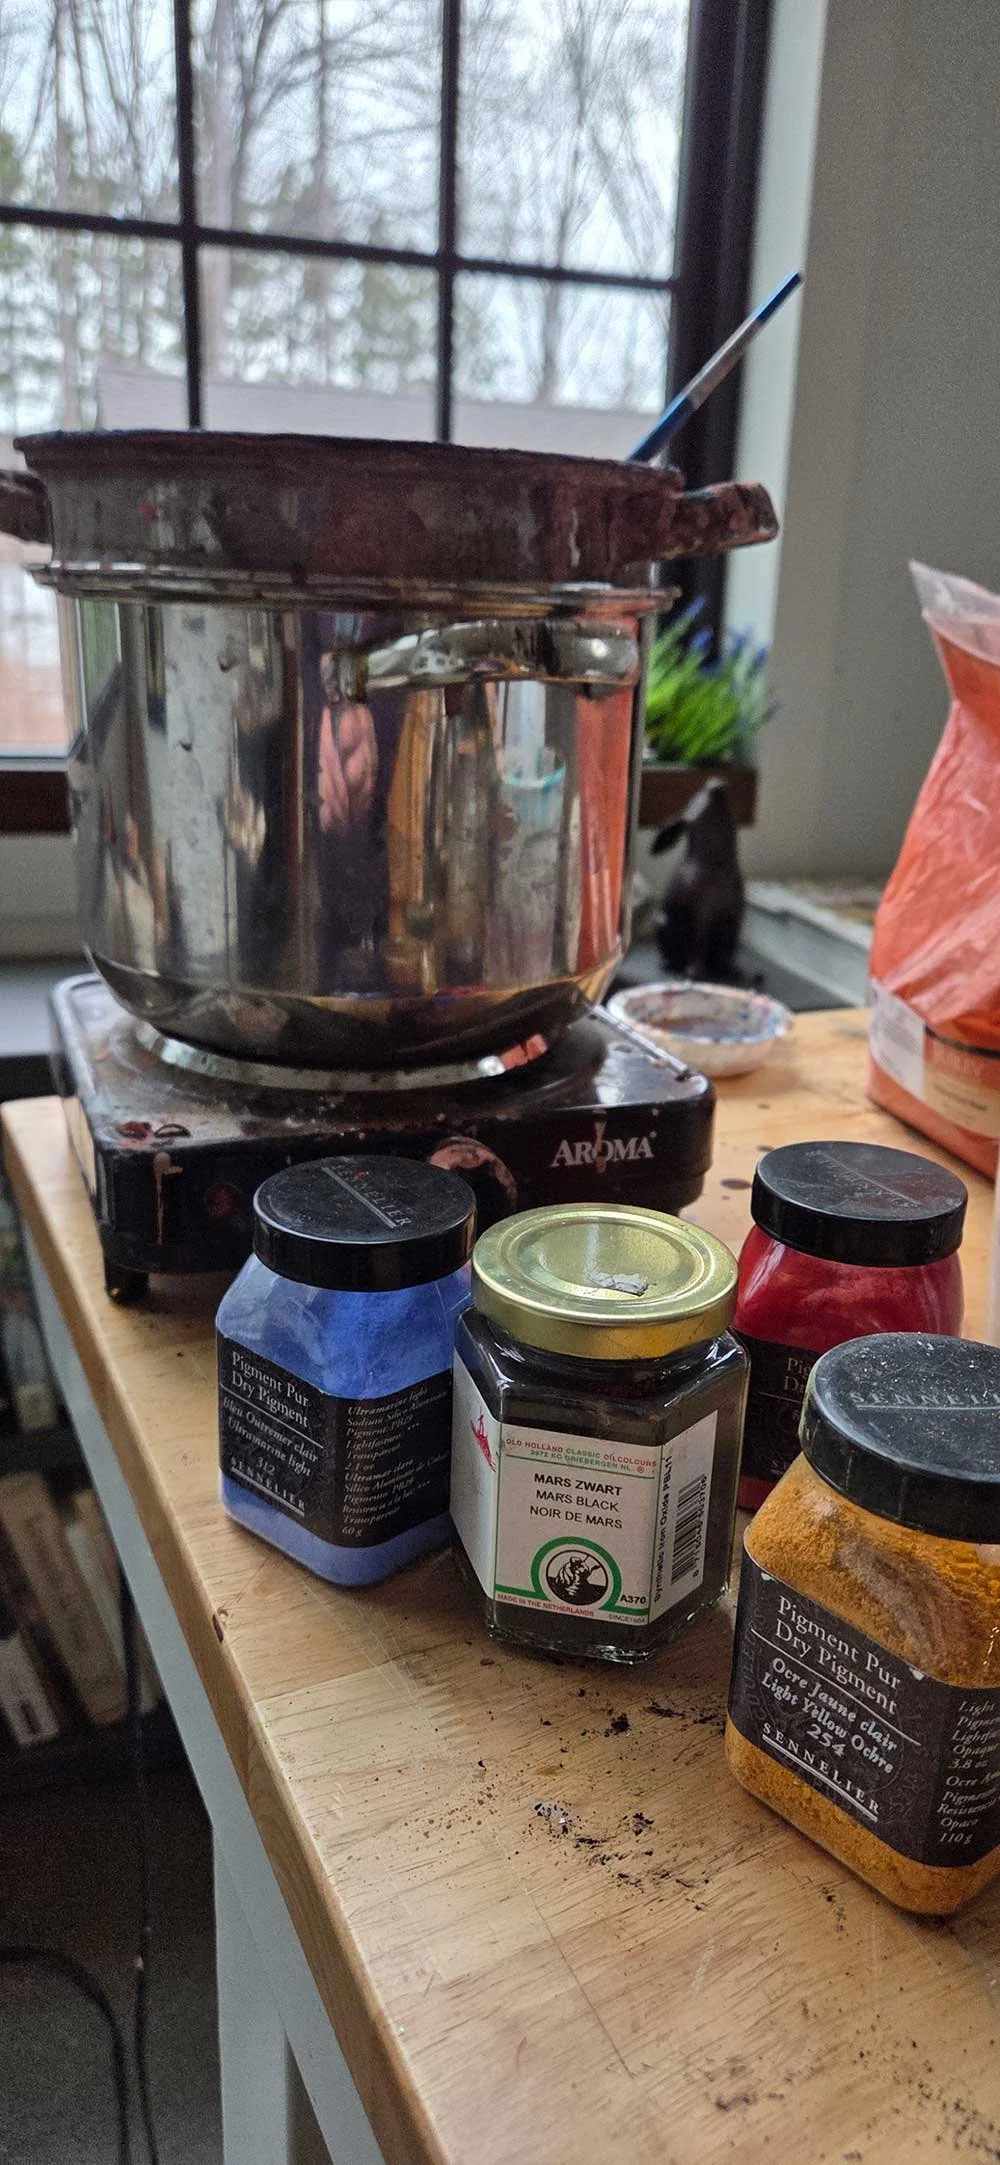
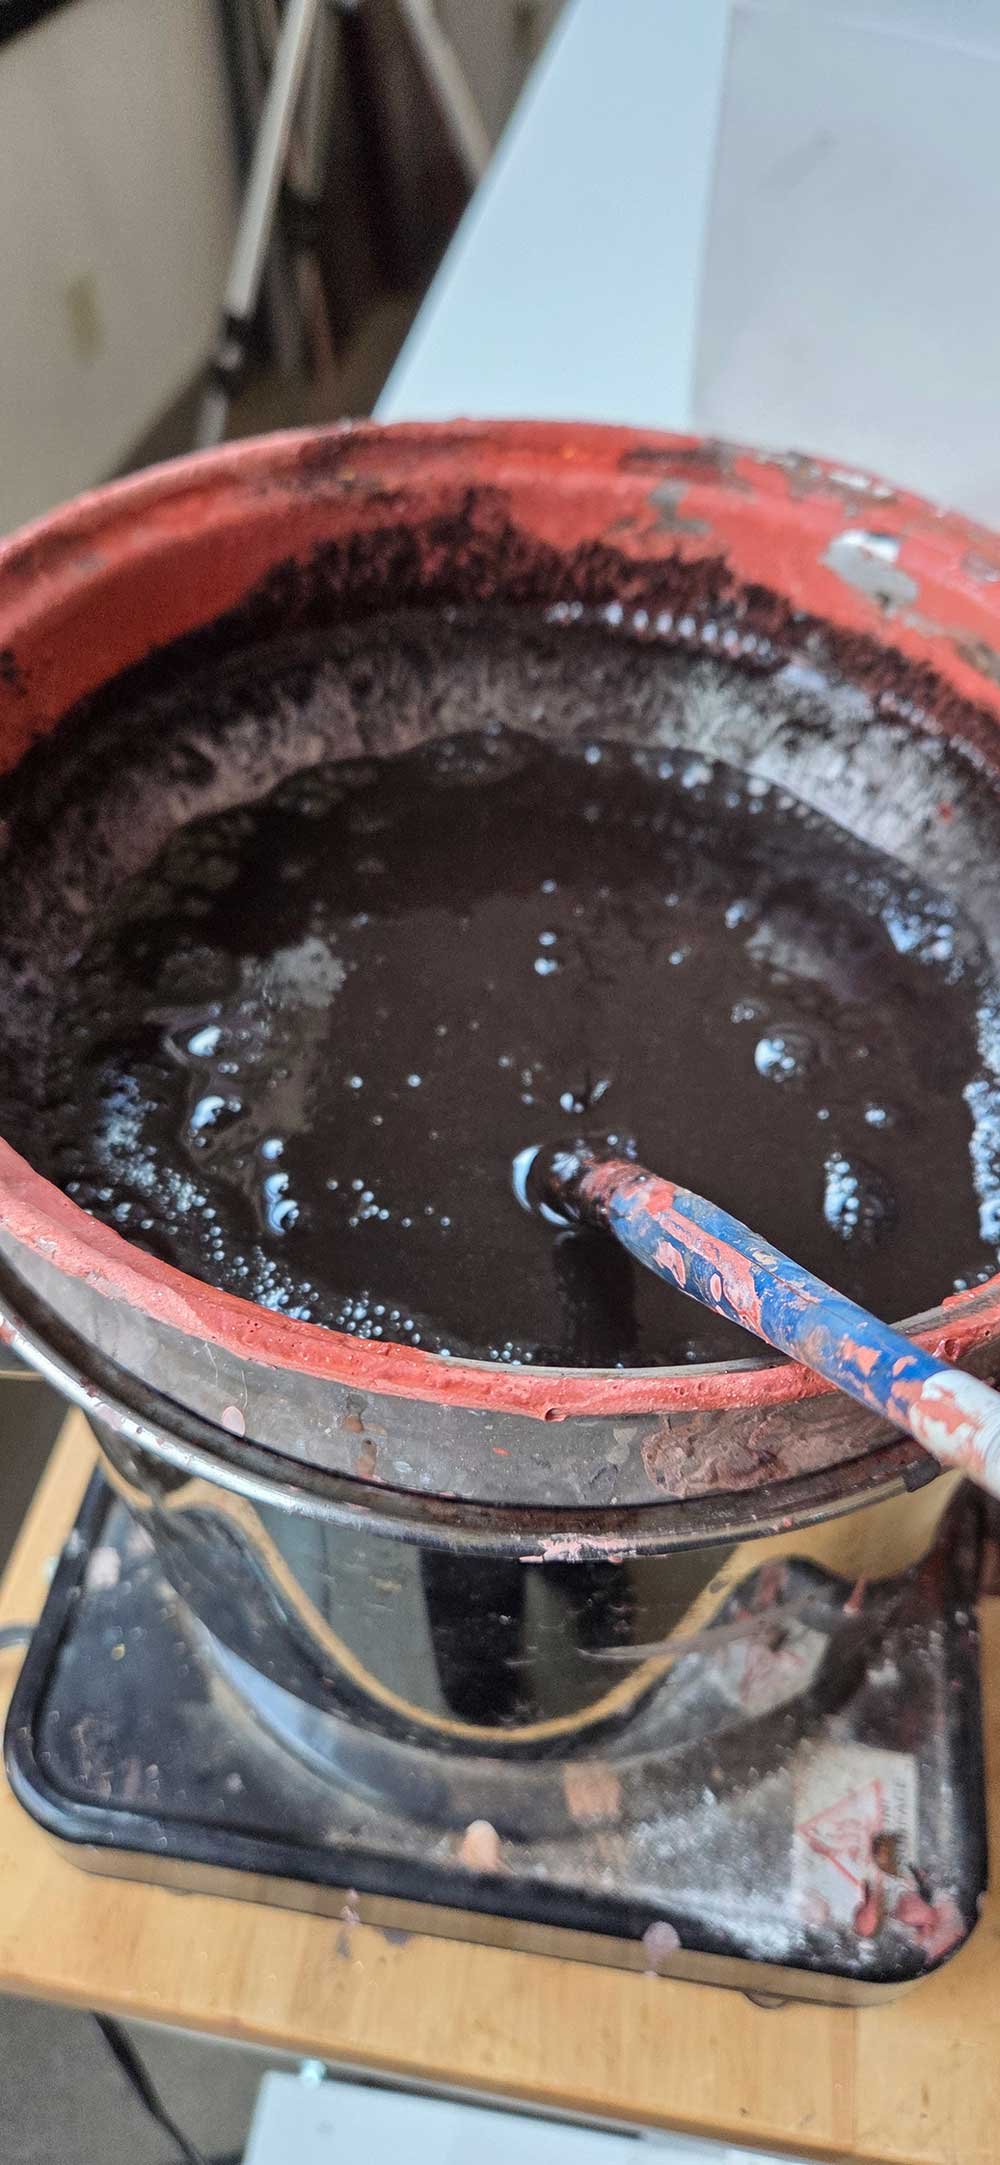
Distemper paint is made by hydrating the hide glue and then heating it to turn the gel into a fluid. I use a double boiler to heat the glue so I don't overheat it and burn it. Typically, I heat the glue until it just starts to liquify, which is usually between 122°F and 140°F.
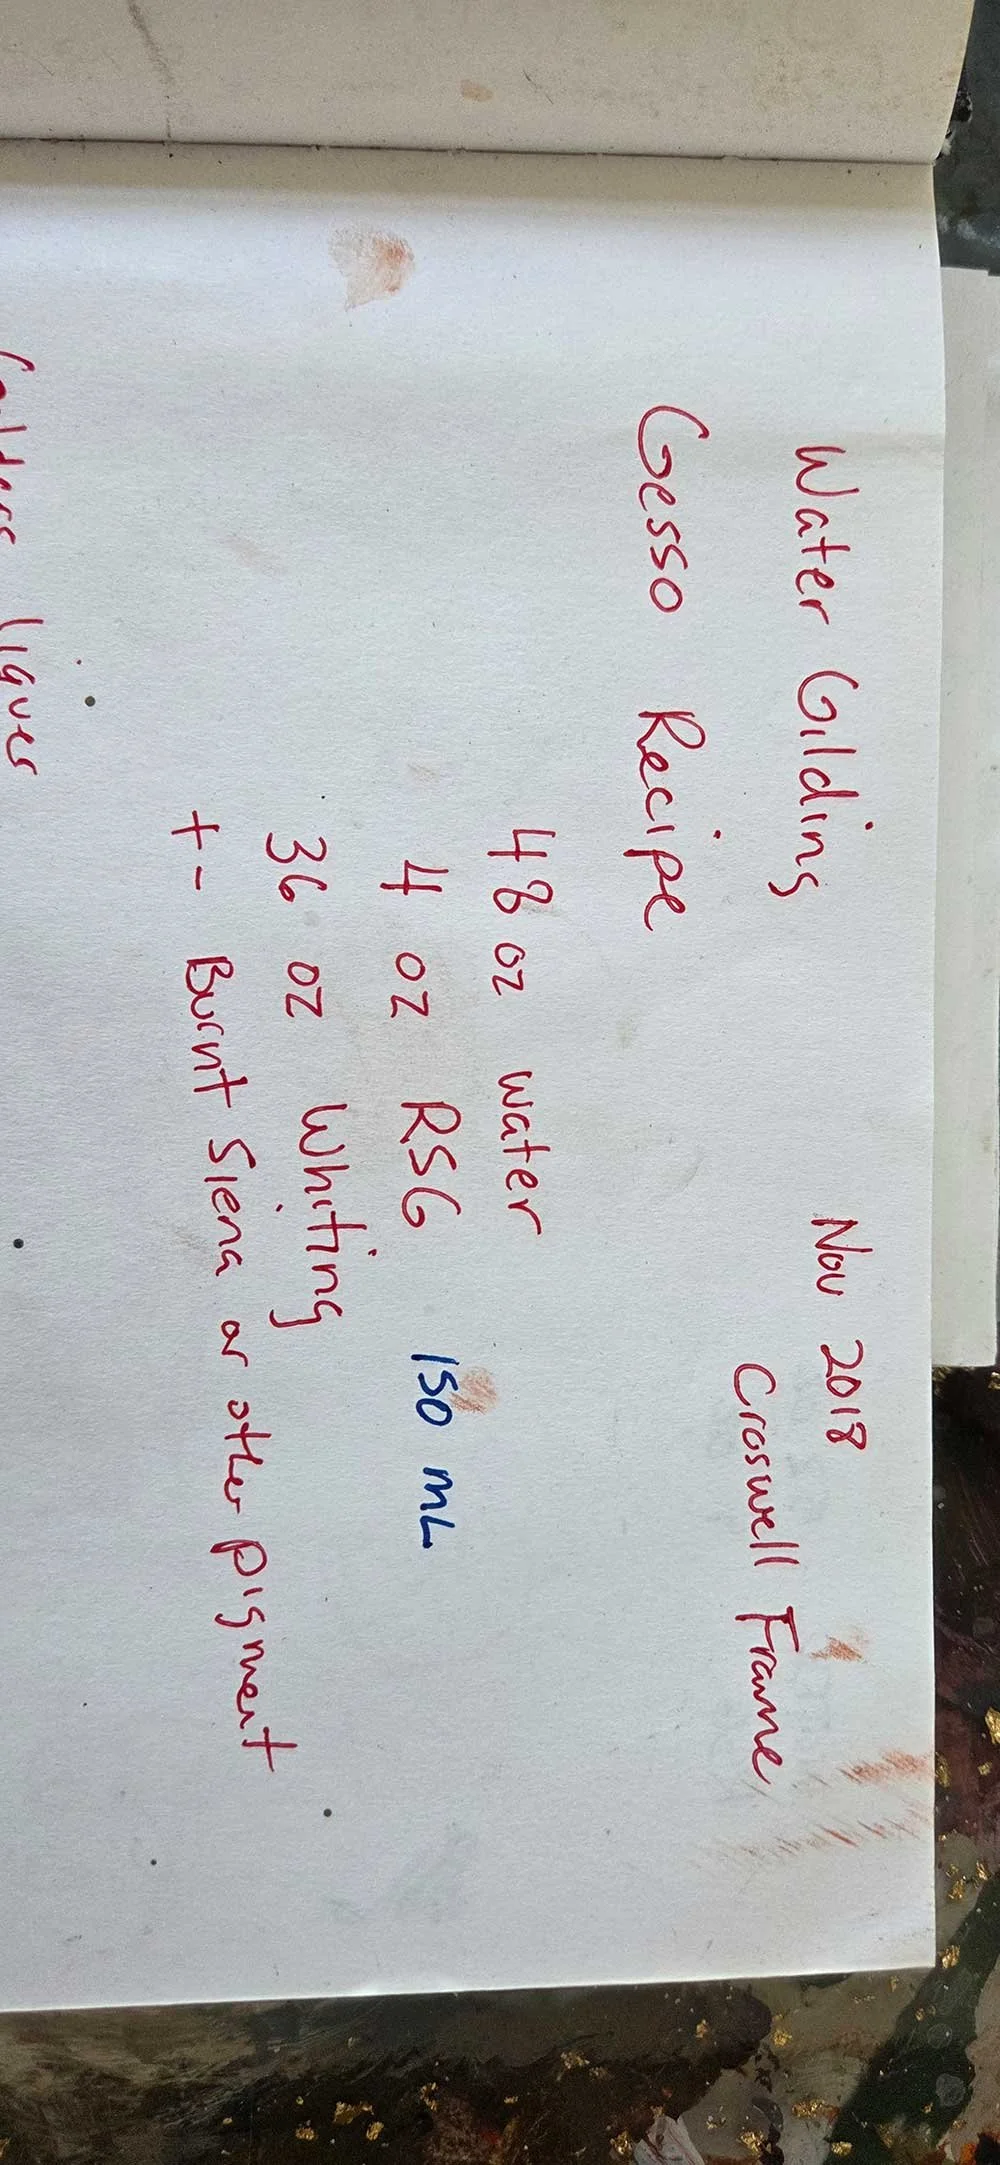
My basic hide glue recipe usually starts with:
4 oz of dry hide glue
48 oz of distilled water (soak to hydrate)
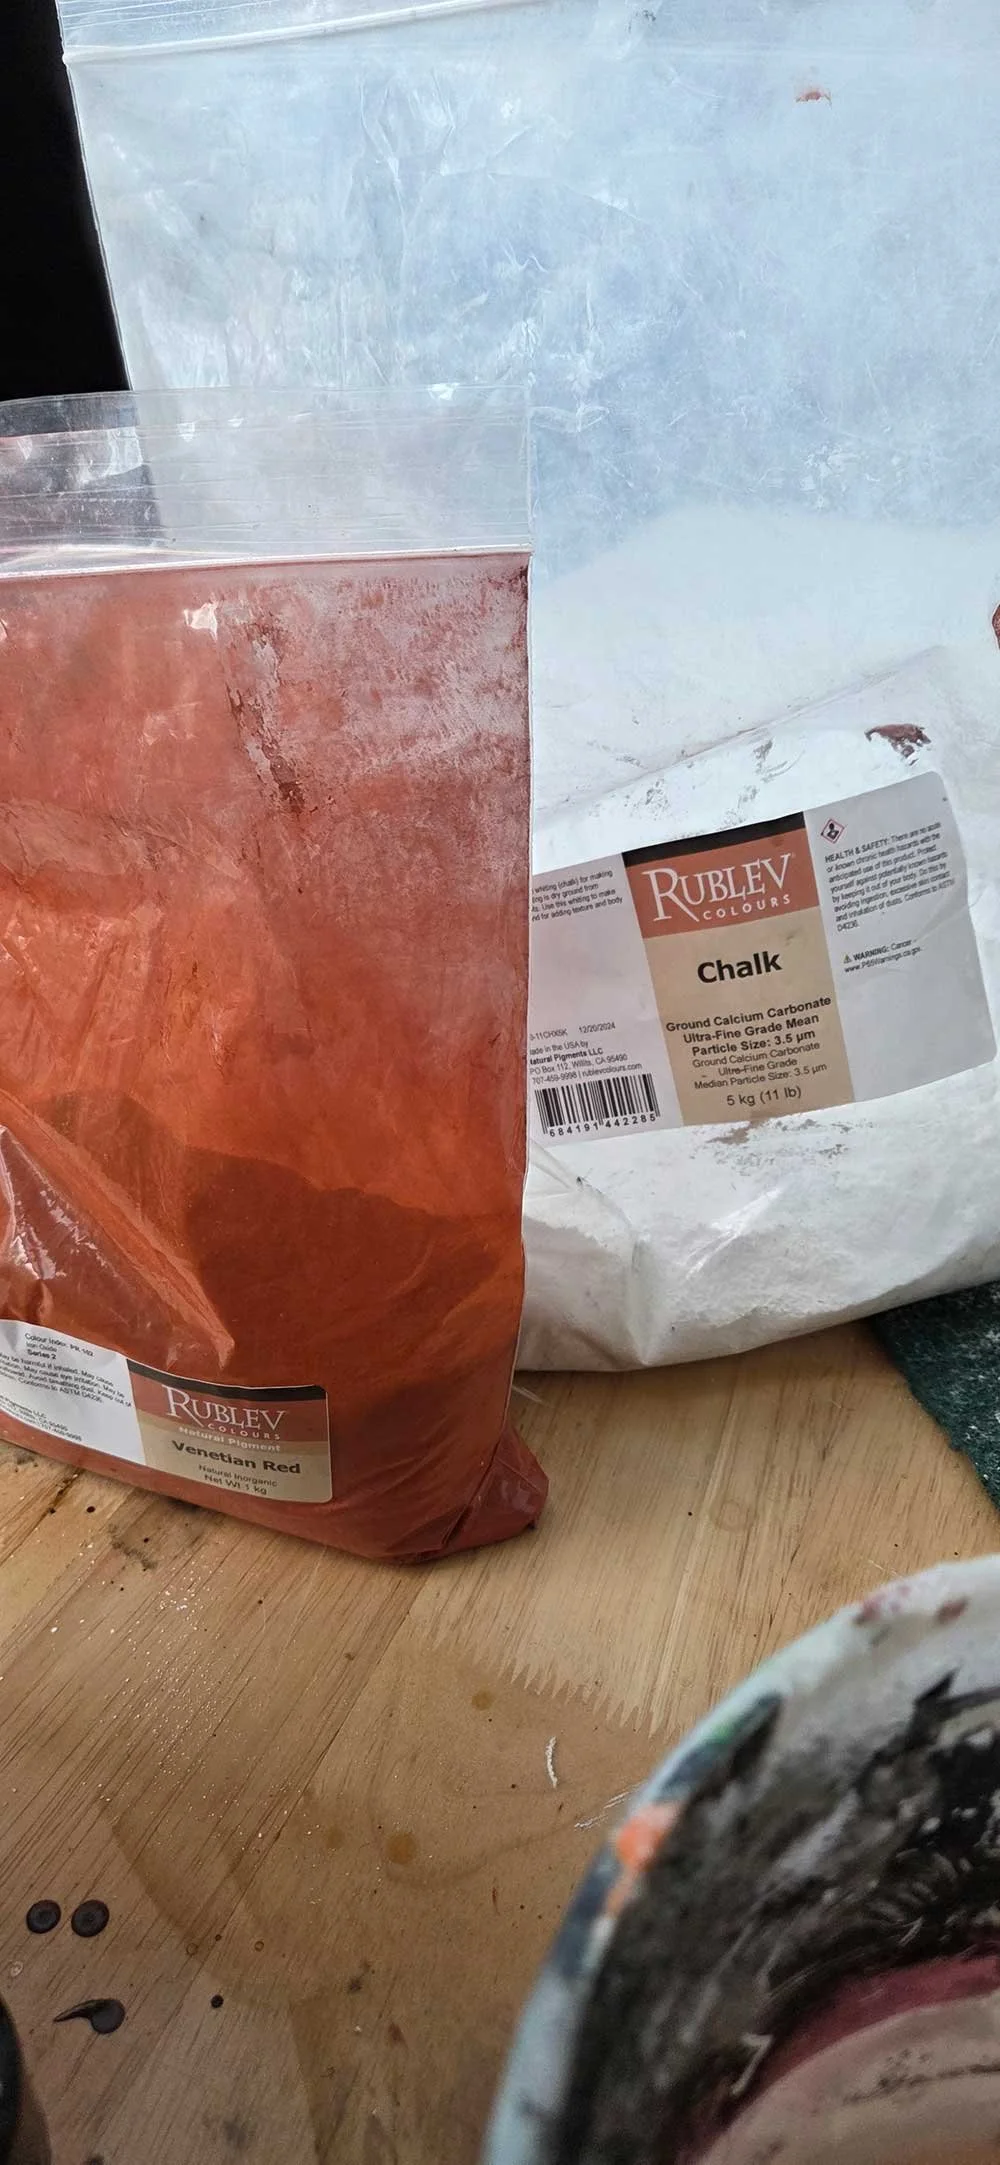
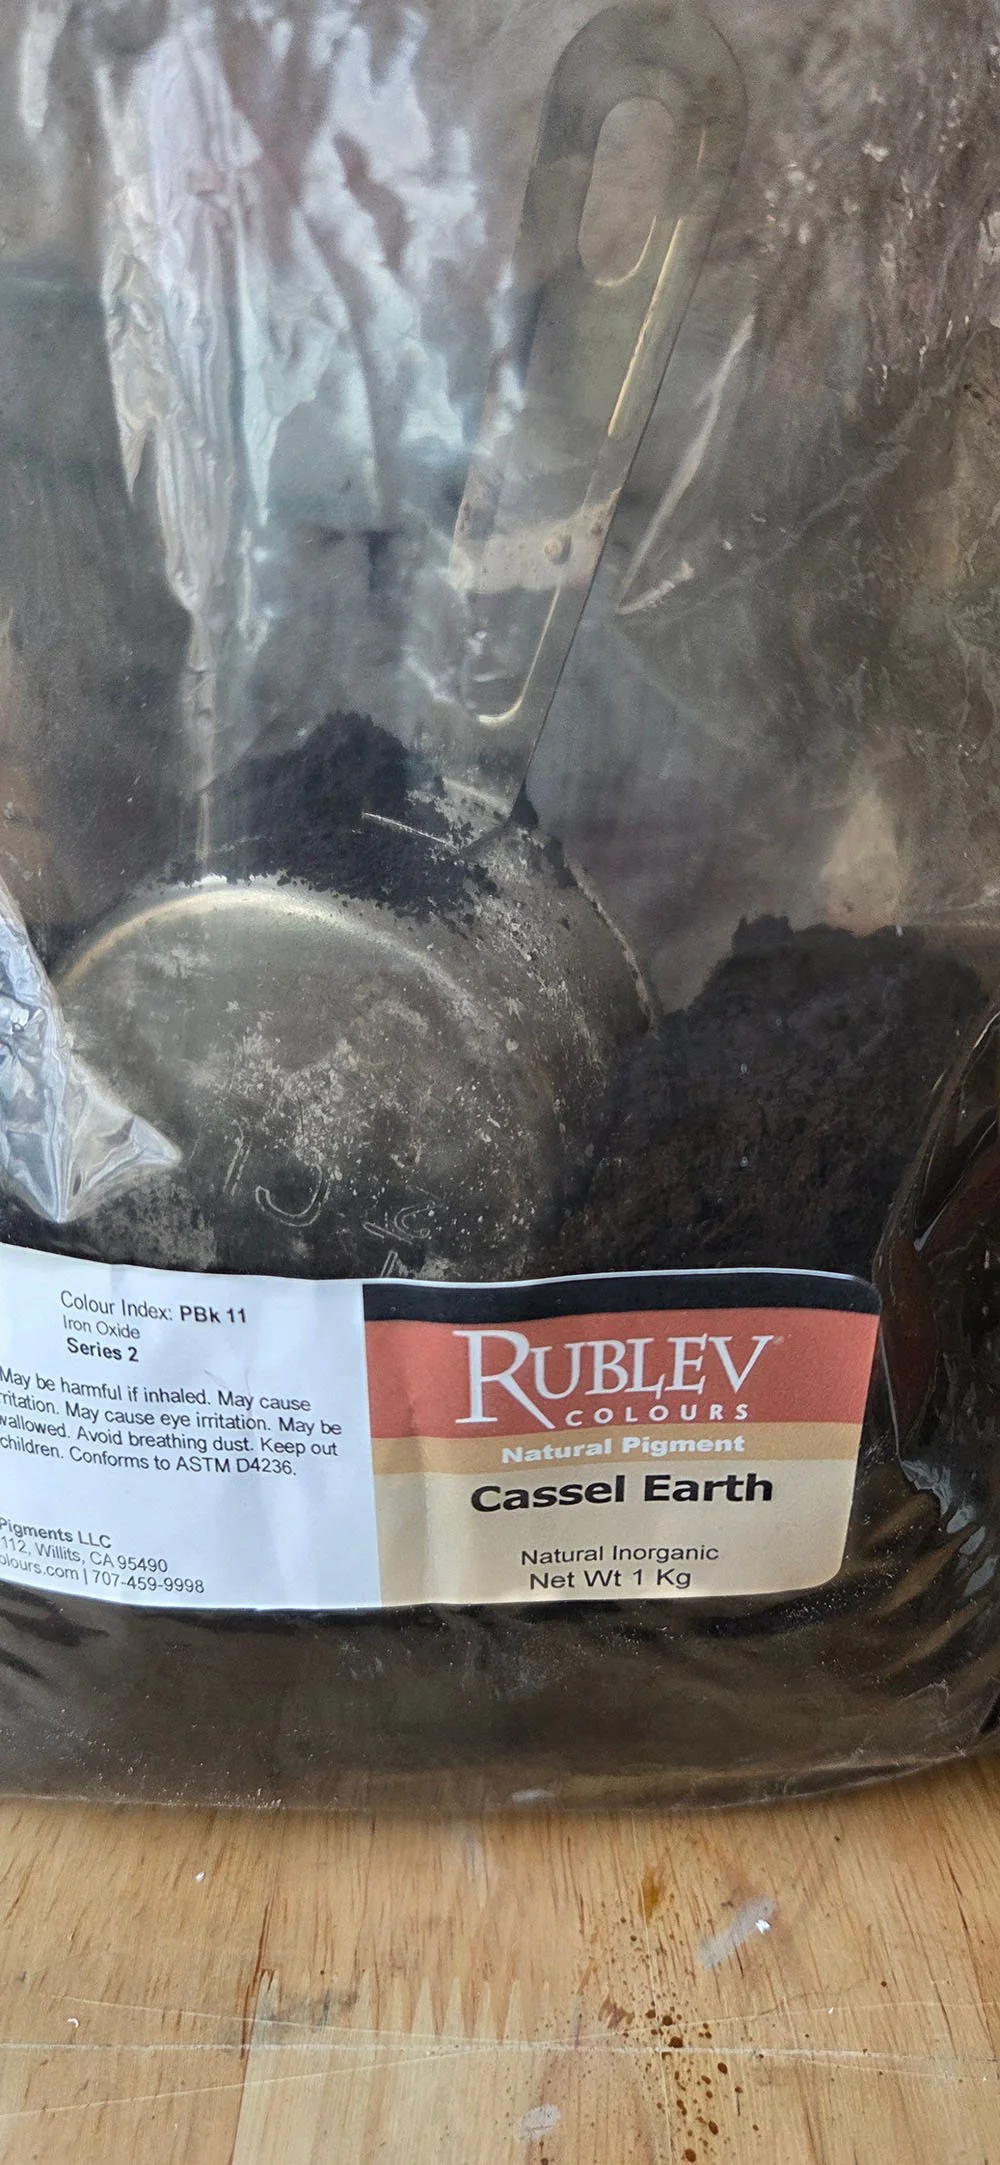
This mixture will stay good for a couple of days. I then place a few cups of this hide recipe in the double boiler and add dry pigments until I get the specific consistency needed for the surface I'm imagining. At this point, I will usually add more water to the paint, especially for the first few coats. The water-to-hide-glue ratio determines how easy the paint will be to sand; the higher the pigment-to-glue ratio, the easier the paint will sand.
Why I Use Distemper
Making and applying distemper paint is incredibly satisfying. When applying it, it has a distinctively velvety feel. While it is hard to make a coat look smooth when it is wet, distemper shrinks significantly as it dries—I'd estimate in the range of 50 percent. This means that even if a brushstroke looks like a big glob on the surface, that glob is barely noticeable once it dries.
The best part about distemper is that I have total control over the characteristics of the paint:
Sandability: For a very sandable surface, I add less glue and more chalk or pigment.
Hardness/Polishing: If I want it to be hard and polishable, I add more glue and less water.
Texture: If I want to add distressed texture, I add more pigment or let the paint dry a bit in the double boiler until it becomes thicker.
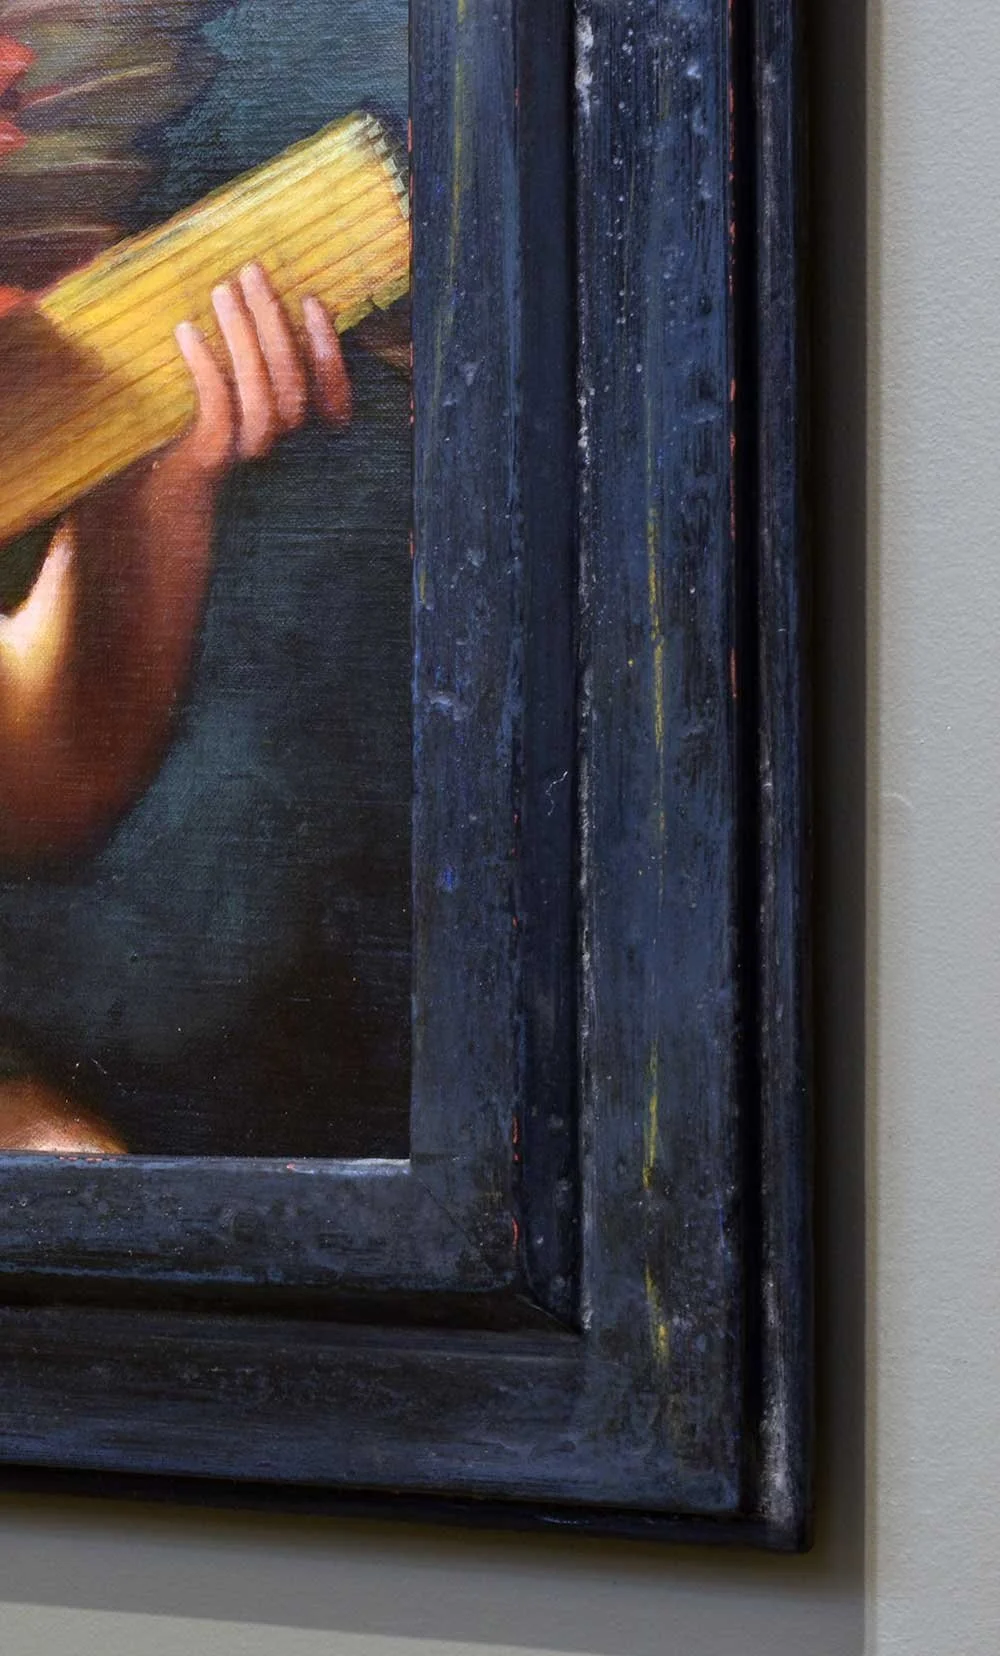
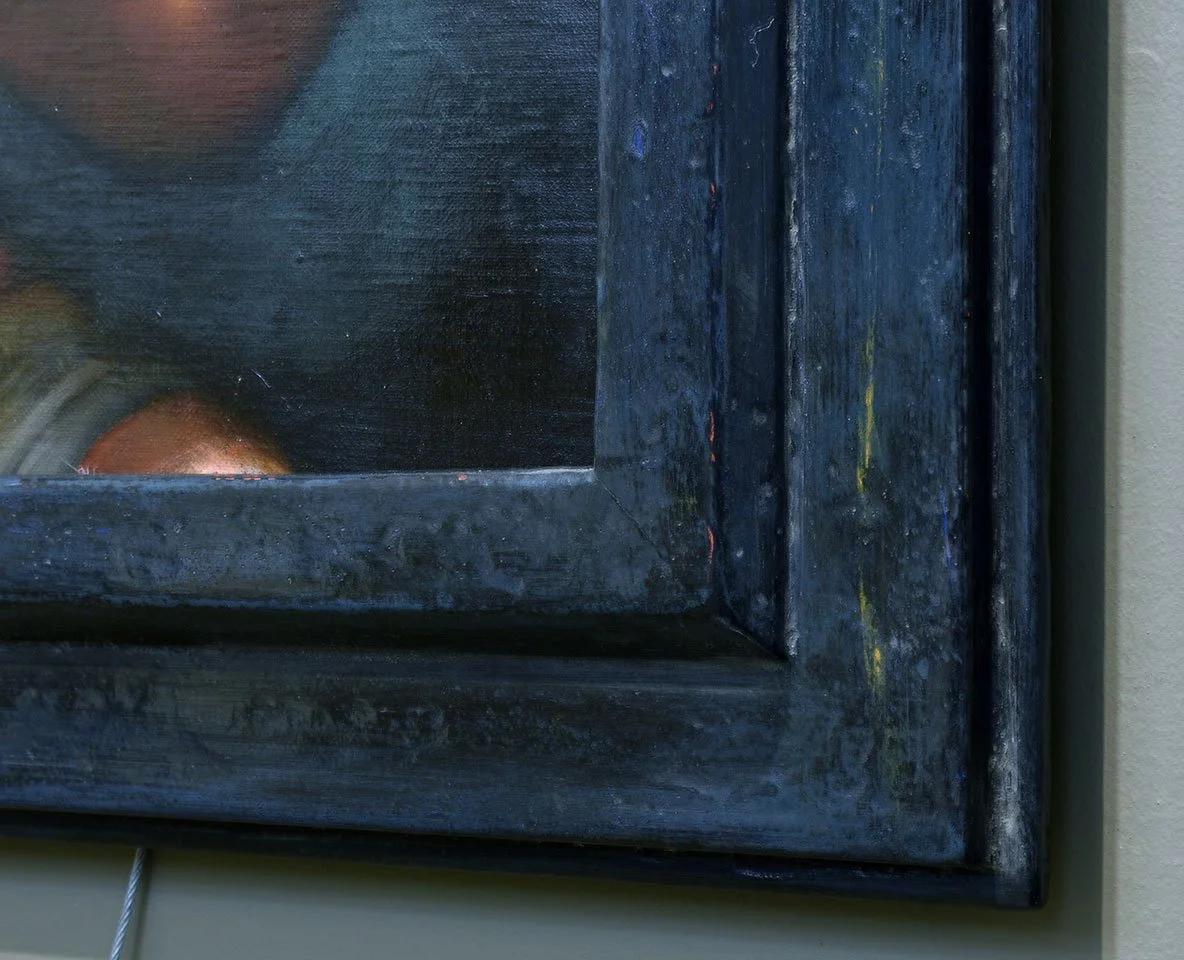
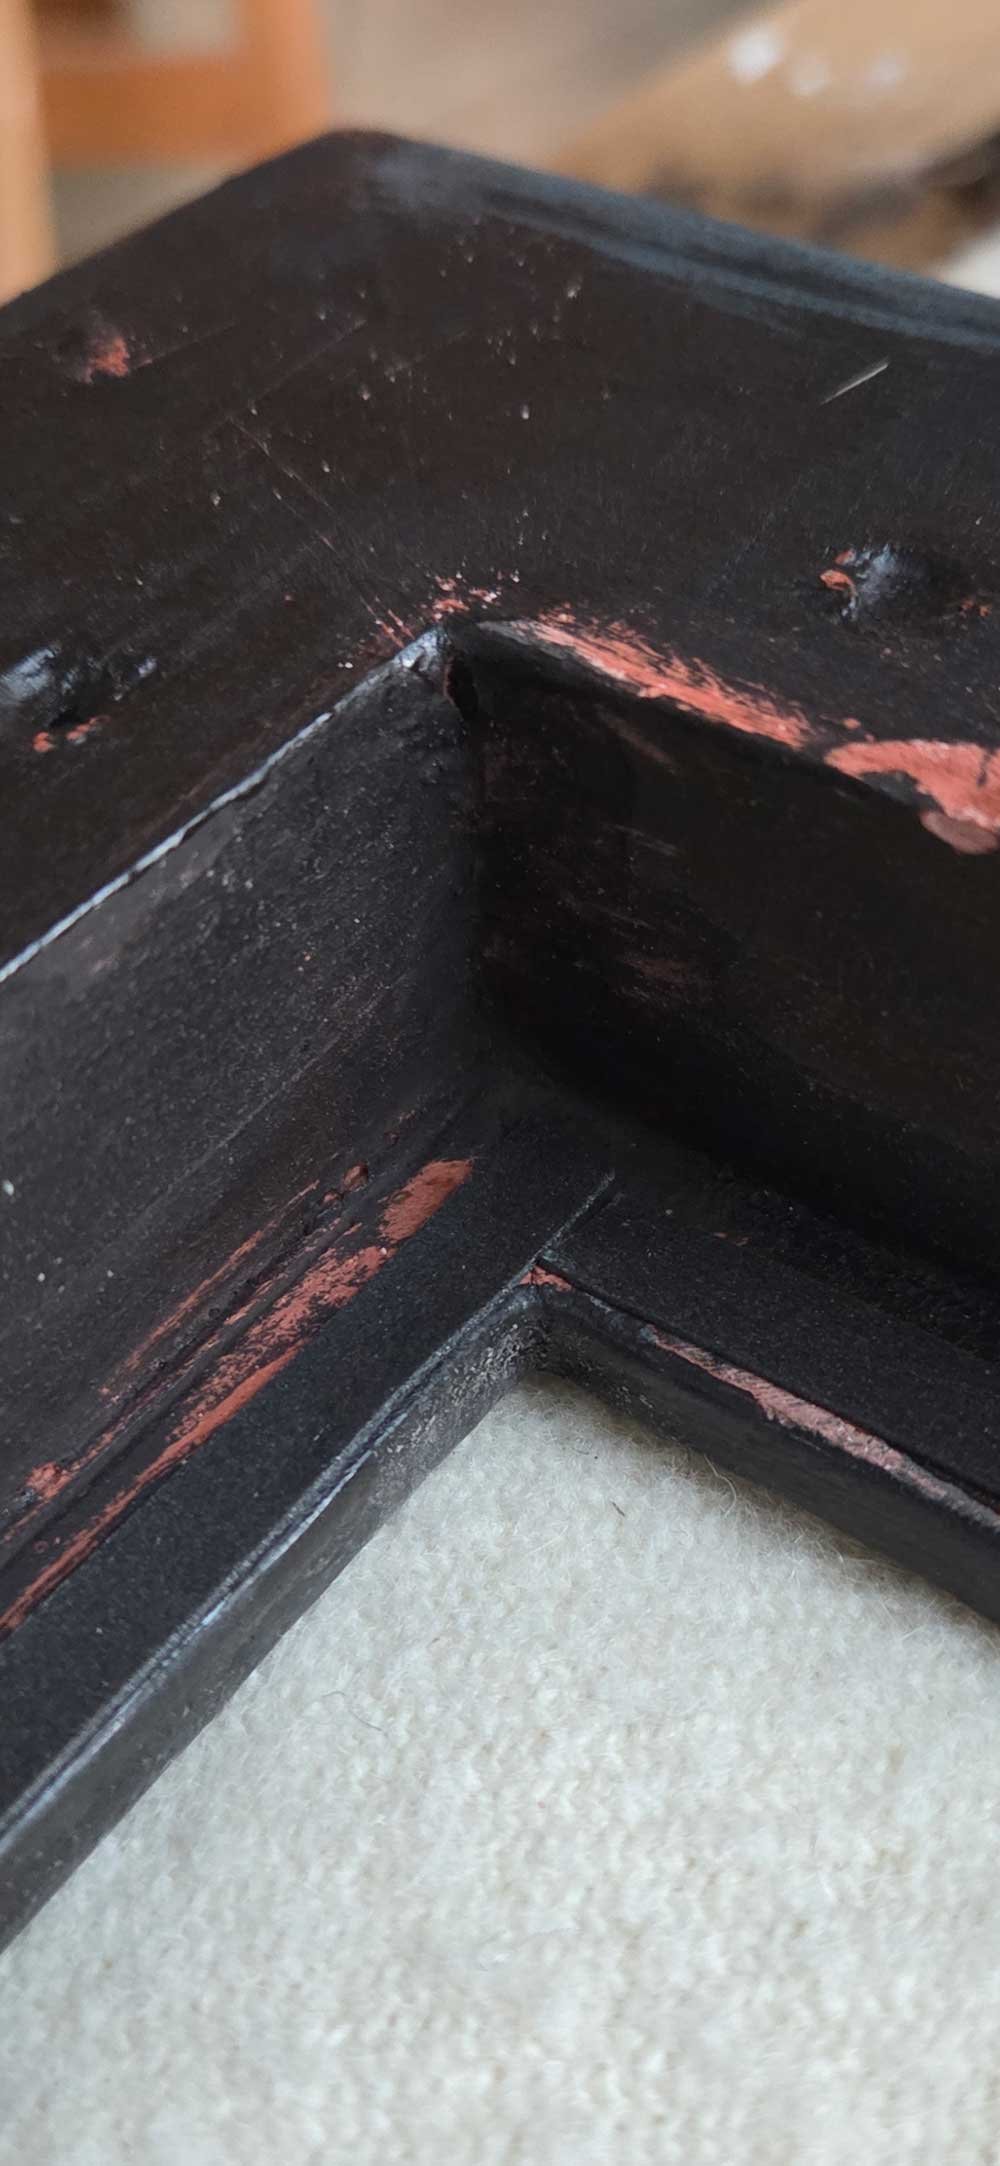
The Finishing Application
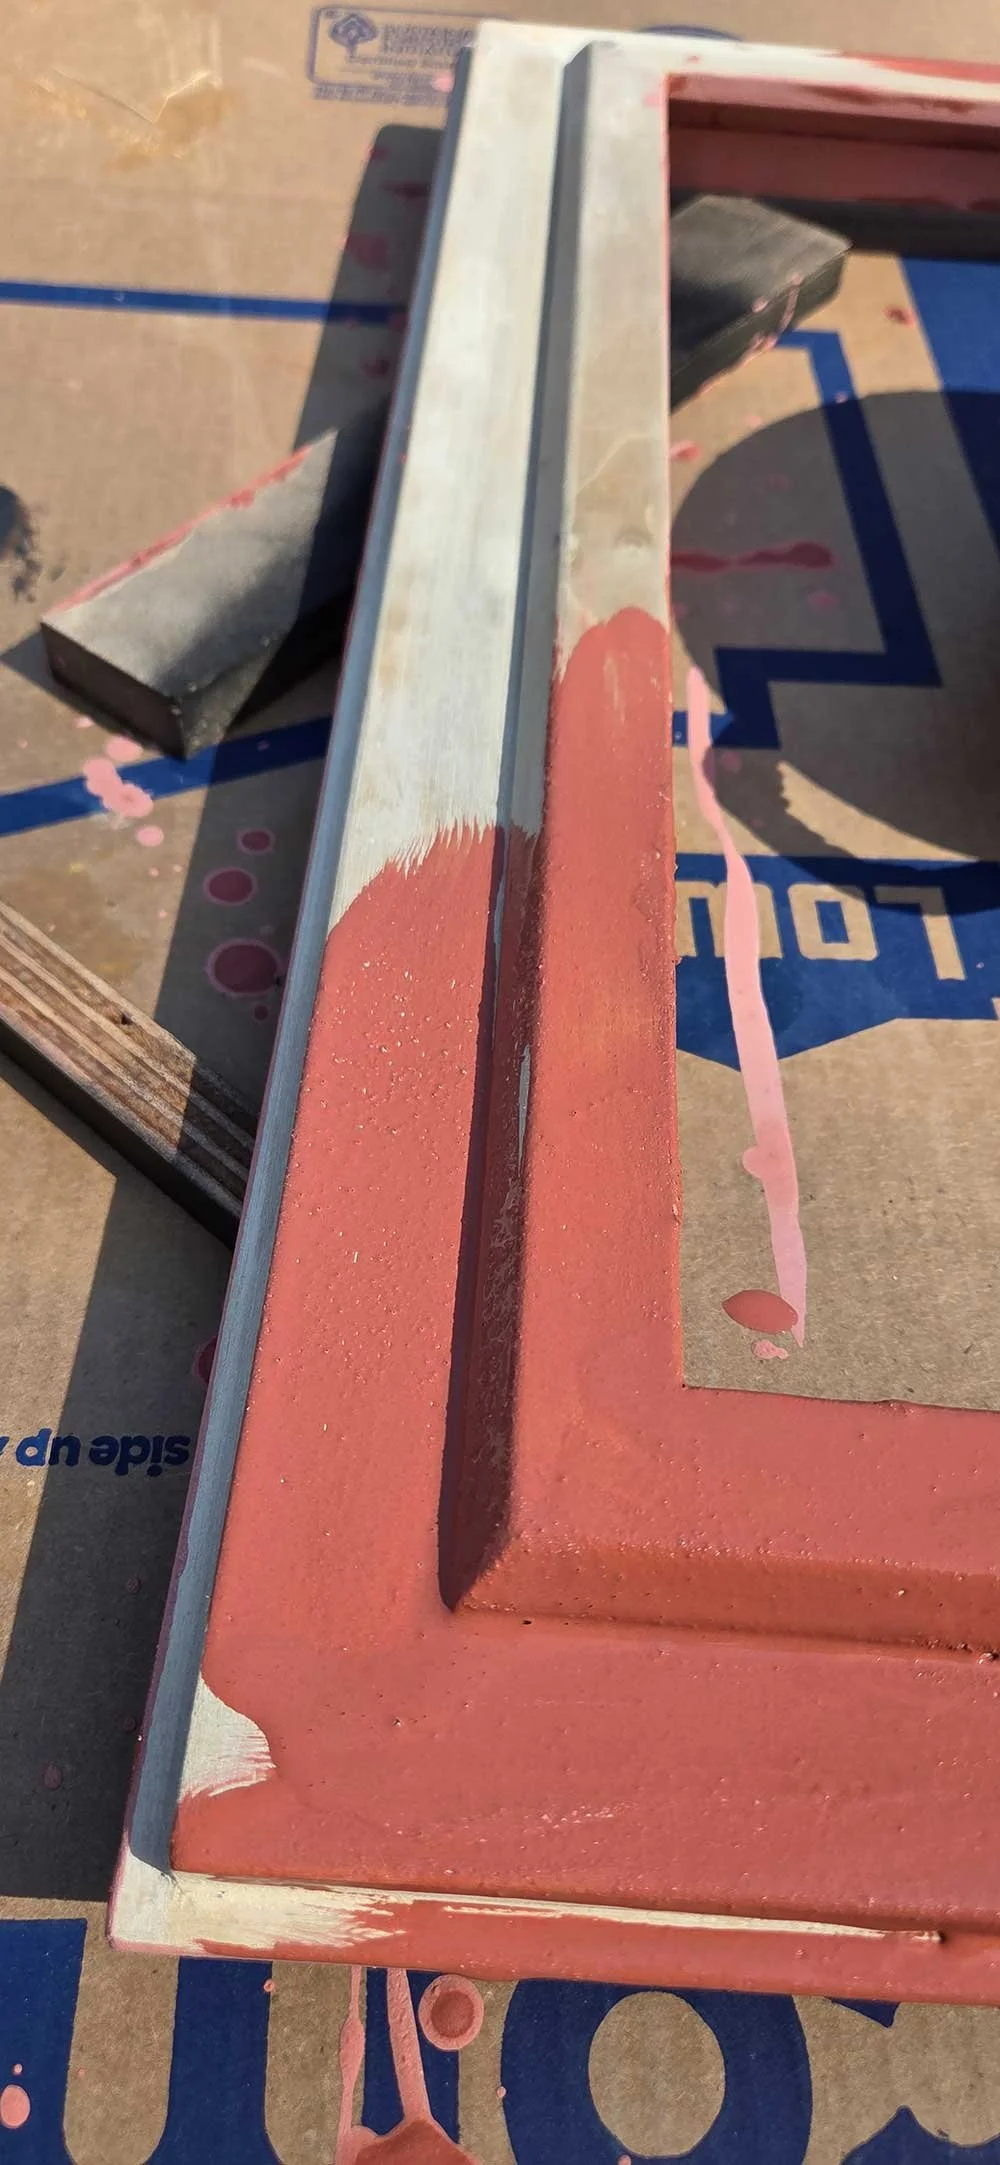
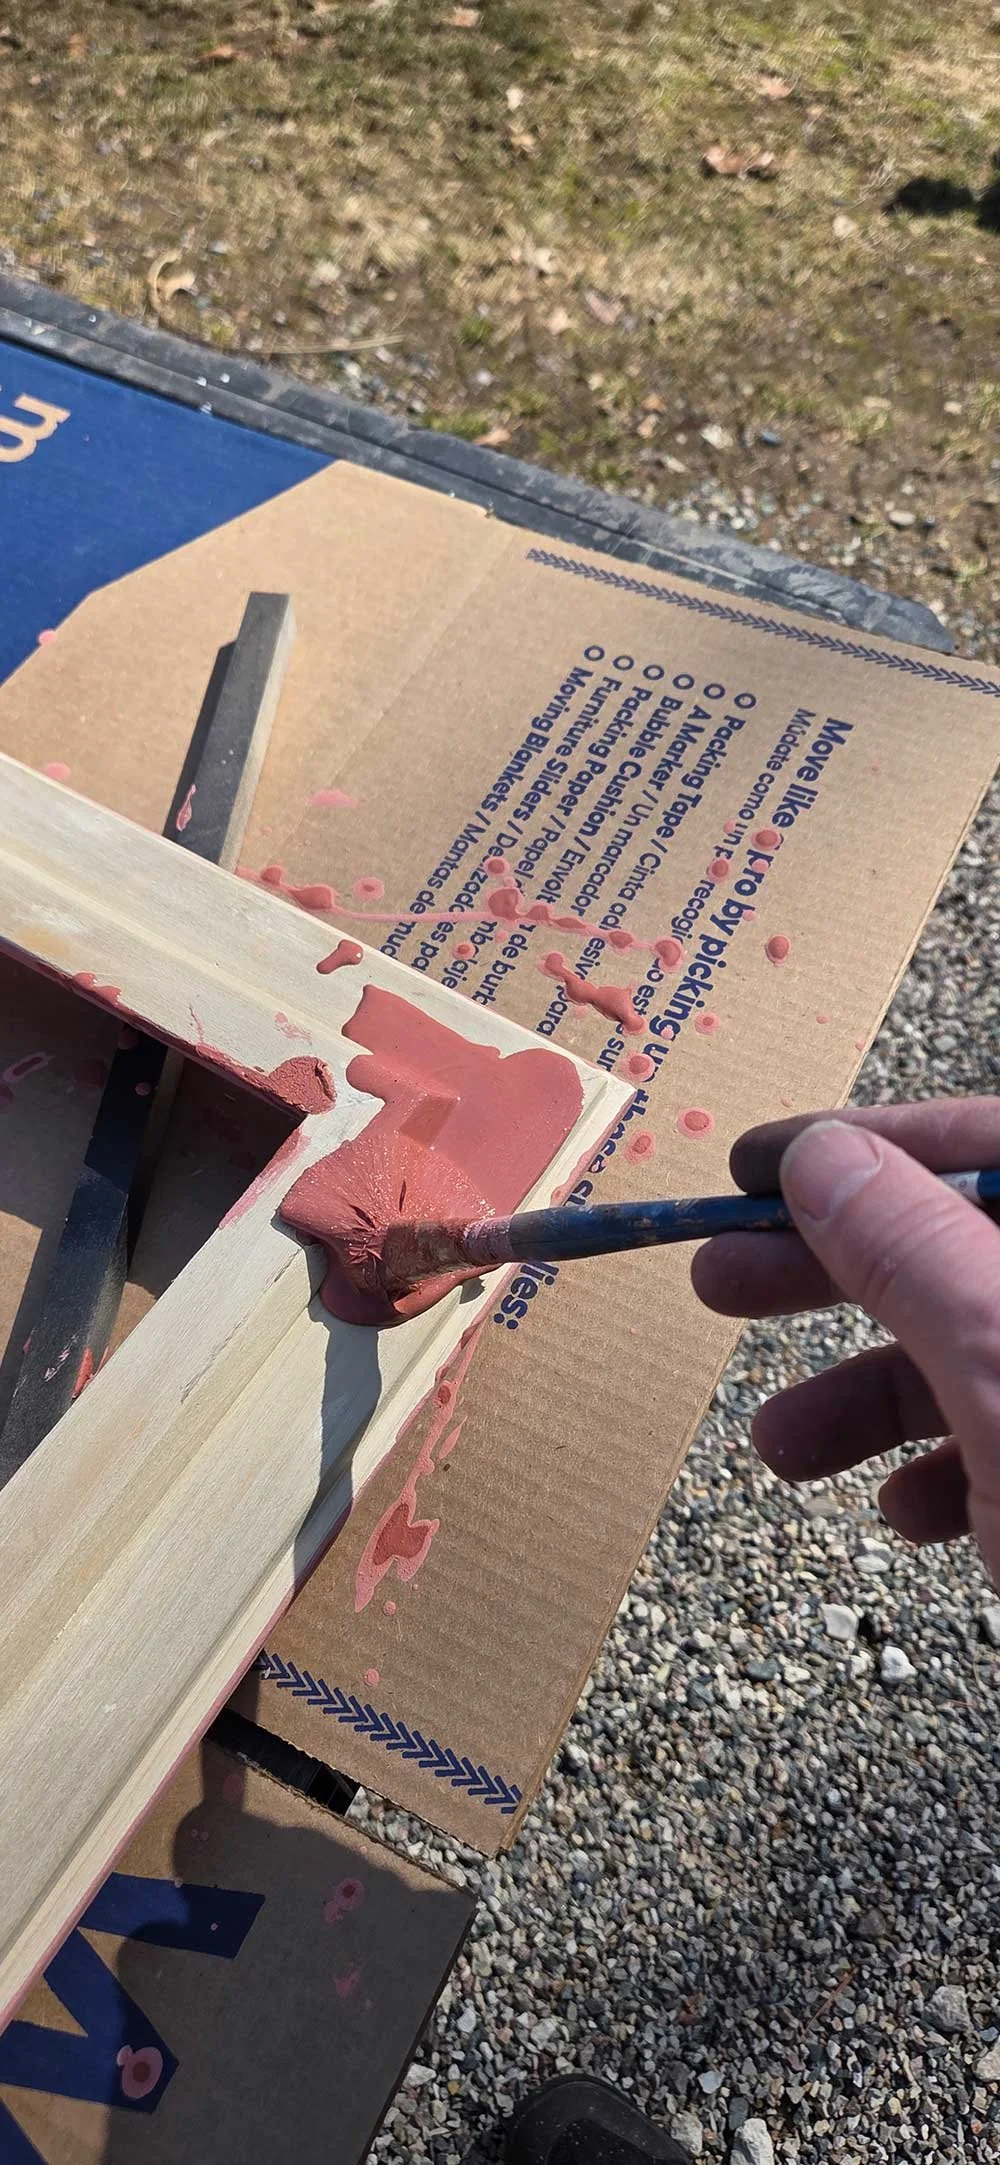
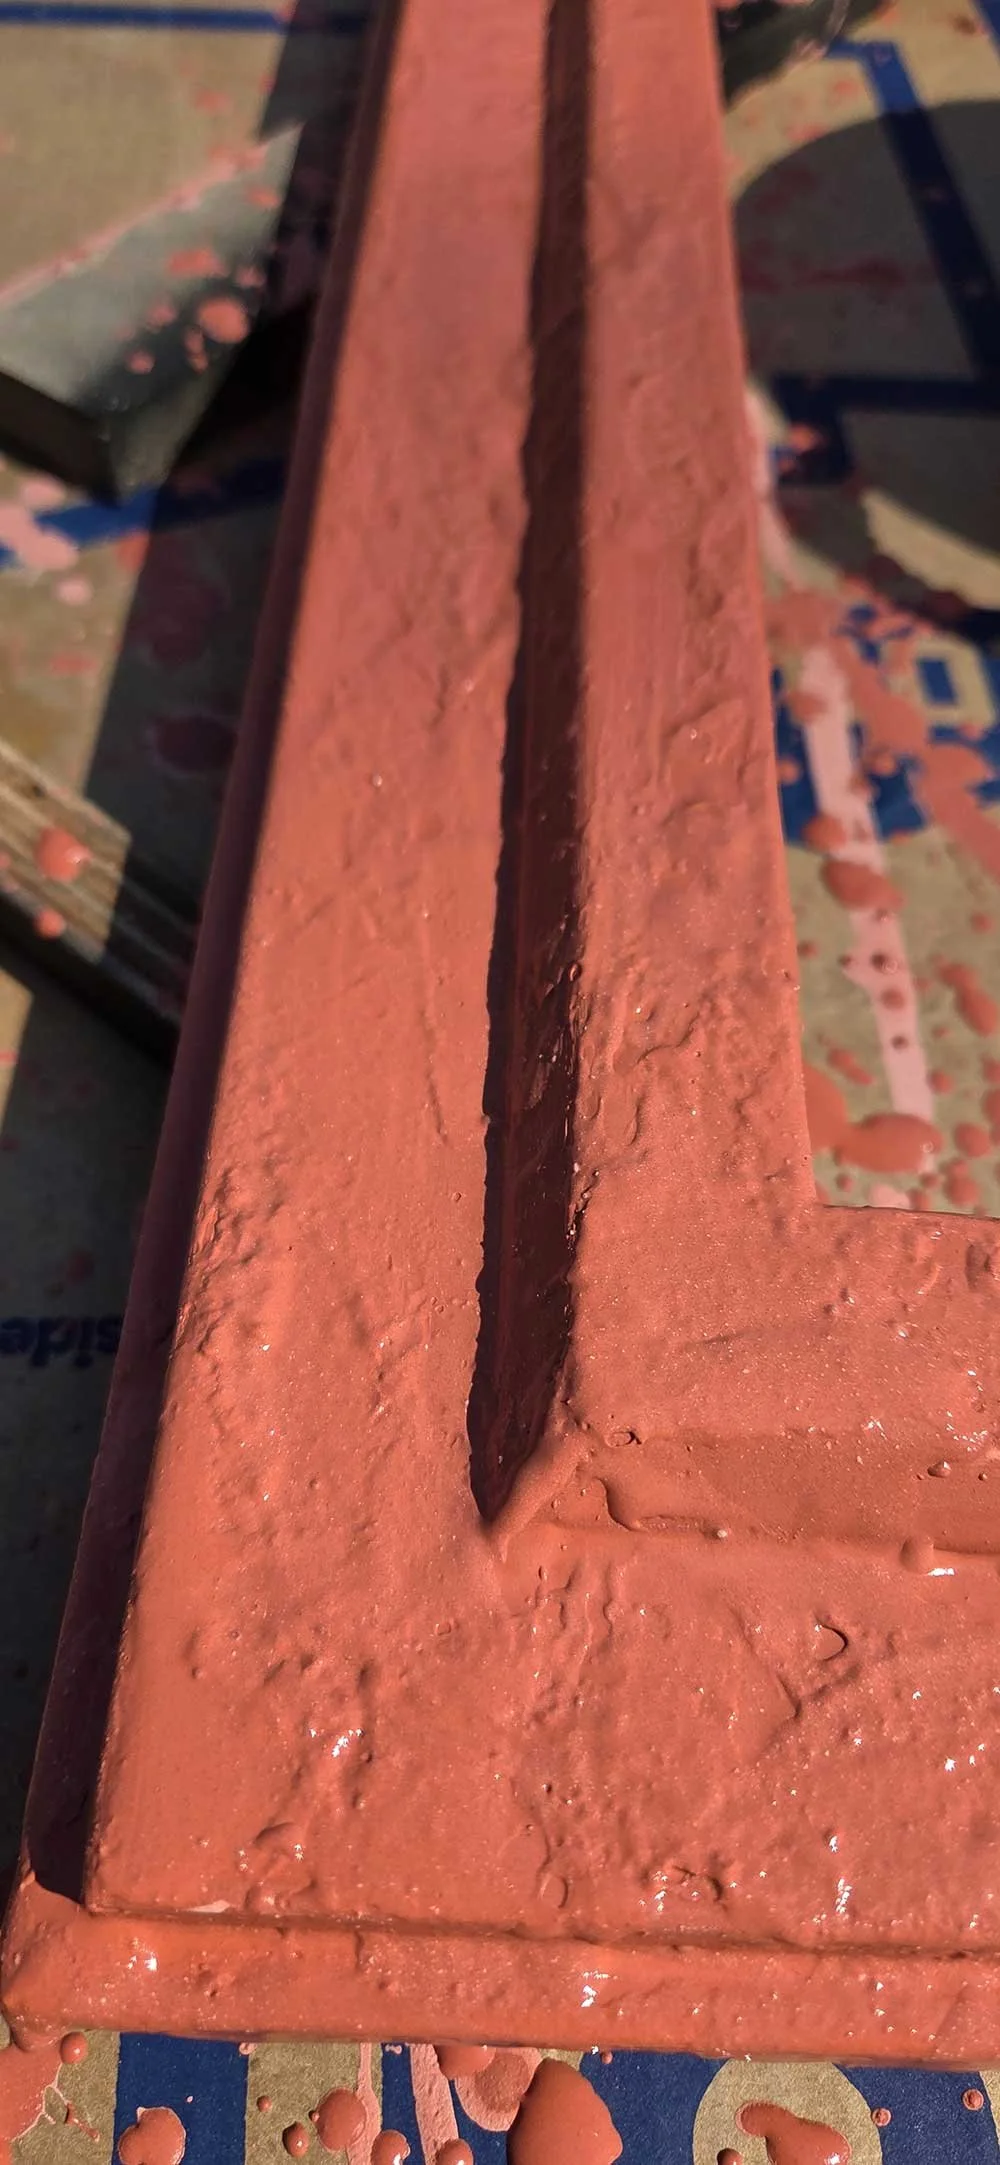
For this frame, I applied three to four base coats of a Venetian red. I applied this roughly, intending to sand it down for a smoother surface. Then, I applied more intentional coats, varying the colors to create the desired effect. I used several Sennelier dry pigments for this stage. I find their pigments ato be extra fine an rich.
The final layer is painted with a mixture containing a higher percentage of hide glue. This allows me to polish the surface until it's as smooth as a rock. The finish I get with this technique is unlike anything else I've been able to create. It feels more substantial. Perhaps it’s just biased "artist talk," but I feel this surface makes the frames look like they have lived a life or have a story.
Once I had many layers of distemper applied and achieved the colors and textures I was after, I began the final sanding. I finished the frame by polishing it with fine 0000 steel wool. At this point, the surface looks like a polished rock.
Step Three: Sealing and Assembly
The only downside to distemper is that until a protective coat is put on, it is highly sensitive to water. Even a drop of water on the surface will cause the hide glue to expand.
To seal the surface, I like to use crystalline wax. For this particular frame, I actually applied a coat of shellac first and then waxed on top of that. The shellac provides a protective gloss sheen that can be altered with steel wool or wax. In the future, I plan on experimenting with adding wax directly to the shellac. In my opinion, the best-looking finish is achieved with just wax and no shellac, but it is definitely not as protected that way.
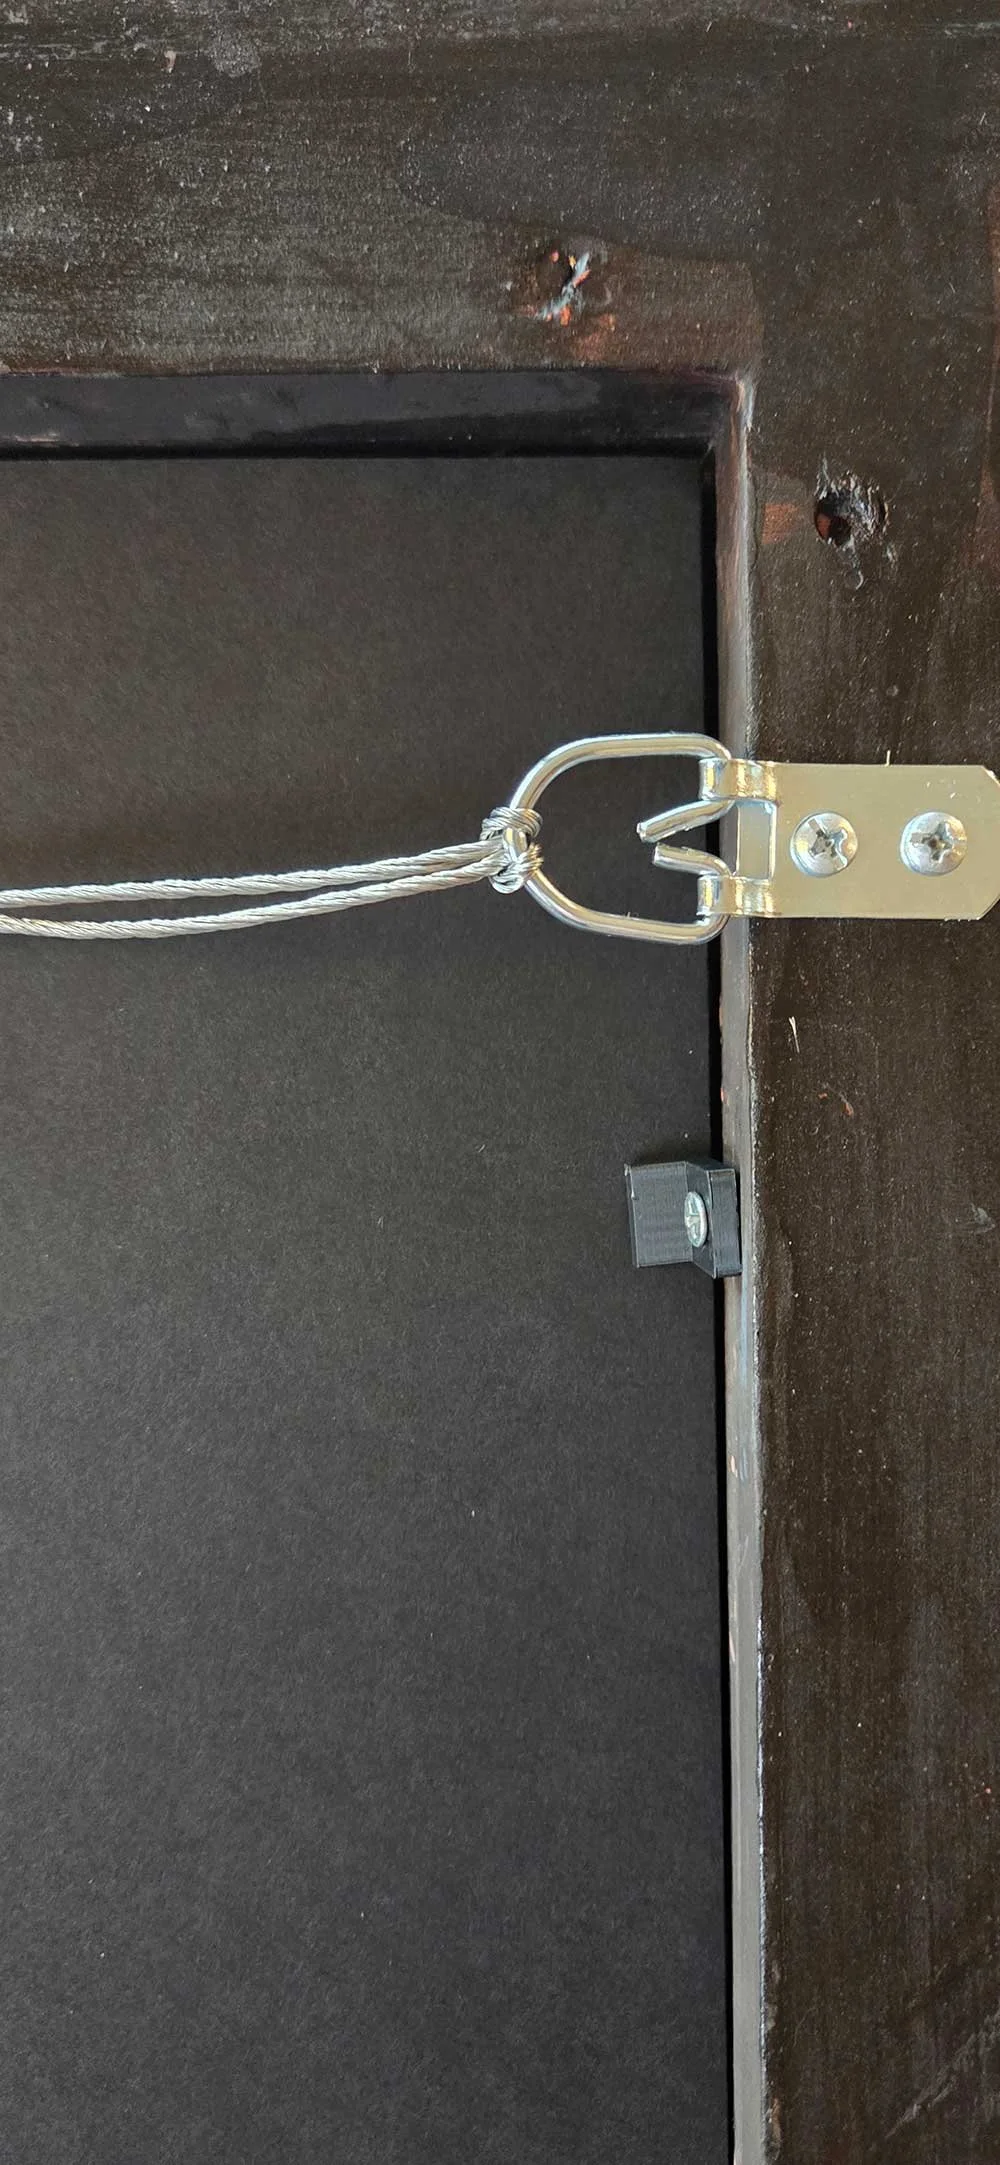
Once the finishing was complete, I assembled the final piece:
I added a foam strip to the rabbet (the groove on the inside back of the frame) to protect the painting from rubbing directly against the wood.
I placed the painting and the backer board.
I added hangers.
I’ve recently started using my 3D printer to make custom spacers and L-brackets to hold and space the painting properly within the frame. It's a nice marriage of a 500-year-old paint recipe and modern technology.
Final Thoughts
With this particular frame, I added some more intense colors to the pigment than I usually do, which added a richness and depth that earth pigments don't always provide. Distemper really does have the feel of a polished marble; this is why it is used as the traditional gesso foundation for water gilding.
There are many details and a great deal of knowledge that goes into building a museum-quality picture frame. I've been contemplating lately how knowledge is gained over a long period. I made my first picture frame about 20 years ago, and doing so is still as satisfying today as it was then.
Browse the gallery above it see pictures of the process along with the final painting and picture frame.